2023-02-01
Let's get started with Neovim
Setting up a basic Neovim config with lazy.nvim
Neovim • Lua
Preface
So I’ve recently made the decision to switch from VSCode to Neovim. I spent hours following tutorials and playing around with different extensions and now I’ve got a setup that I’m happy with, here’s a screenshot of my what my config looks like running within Neovide, a Rust built GUI wrapper for Neovim:
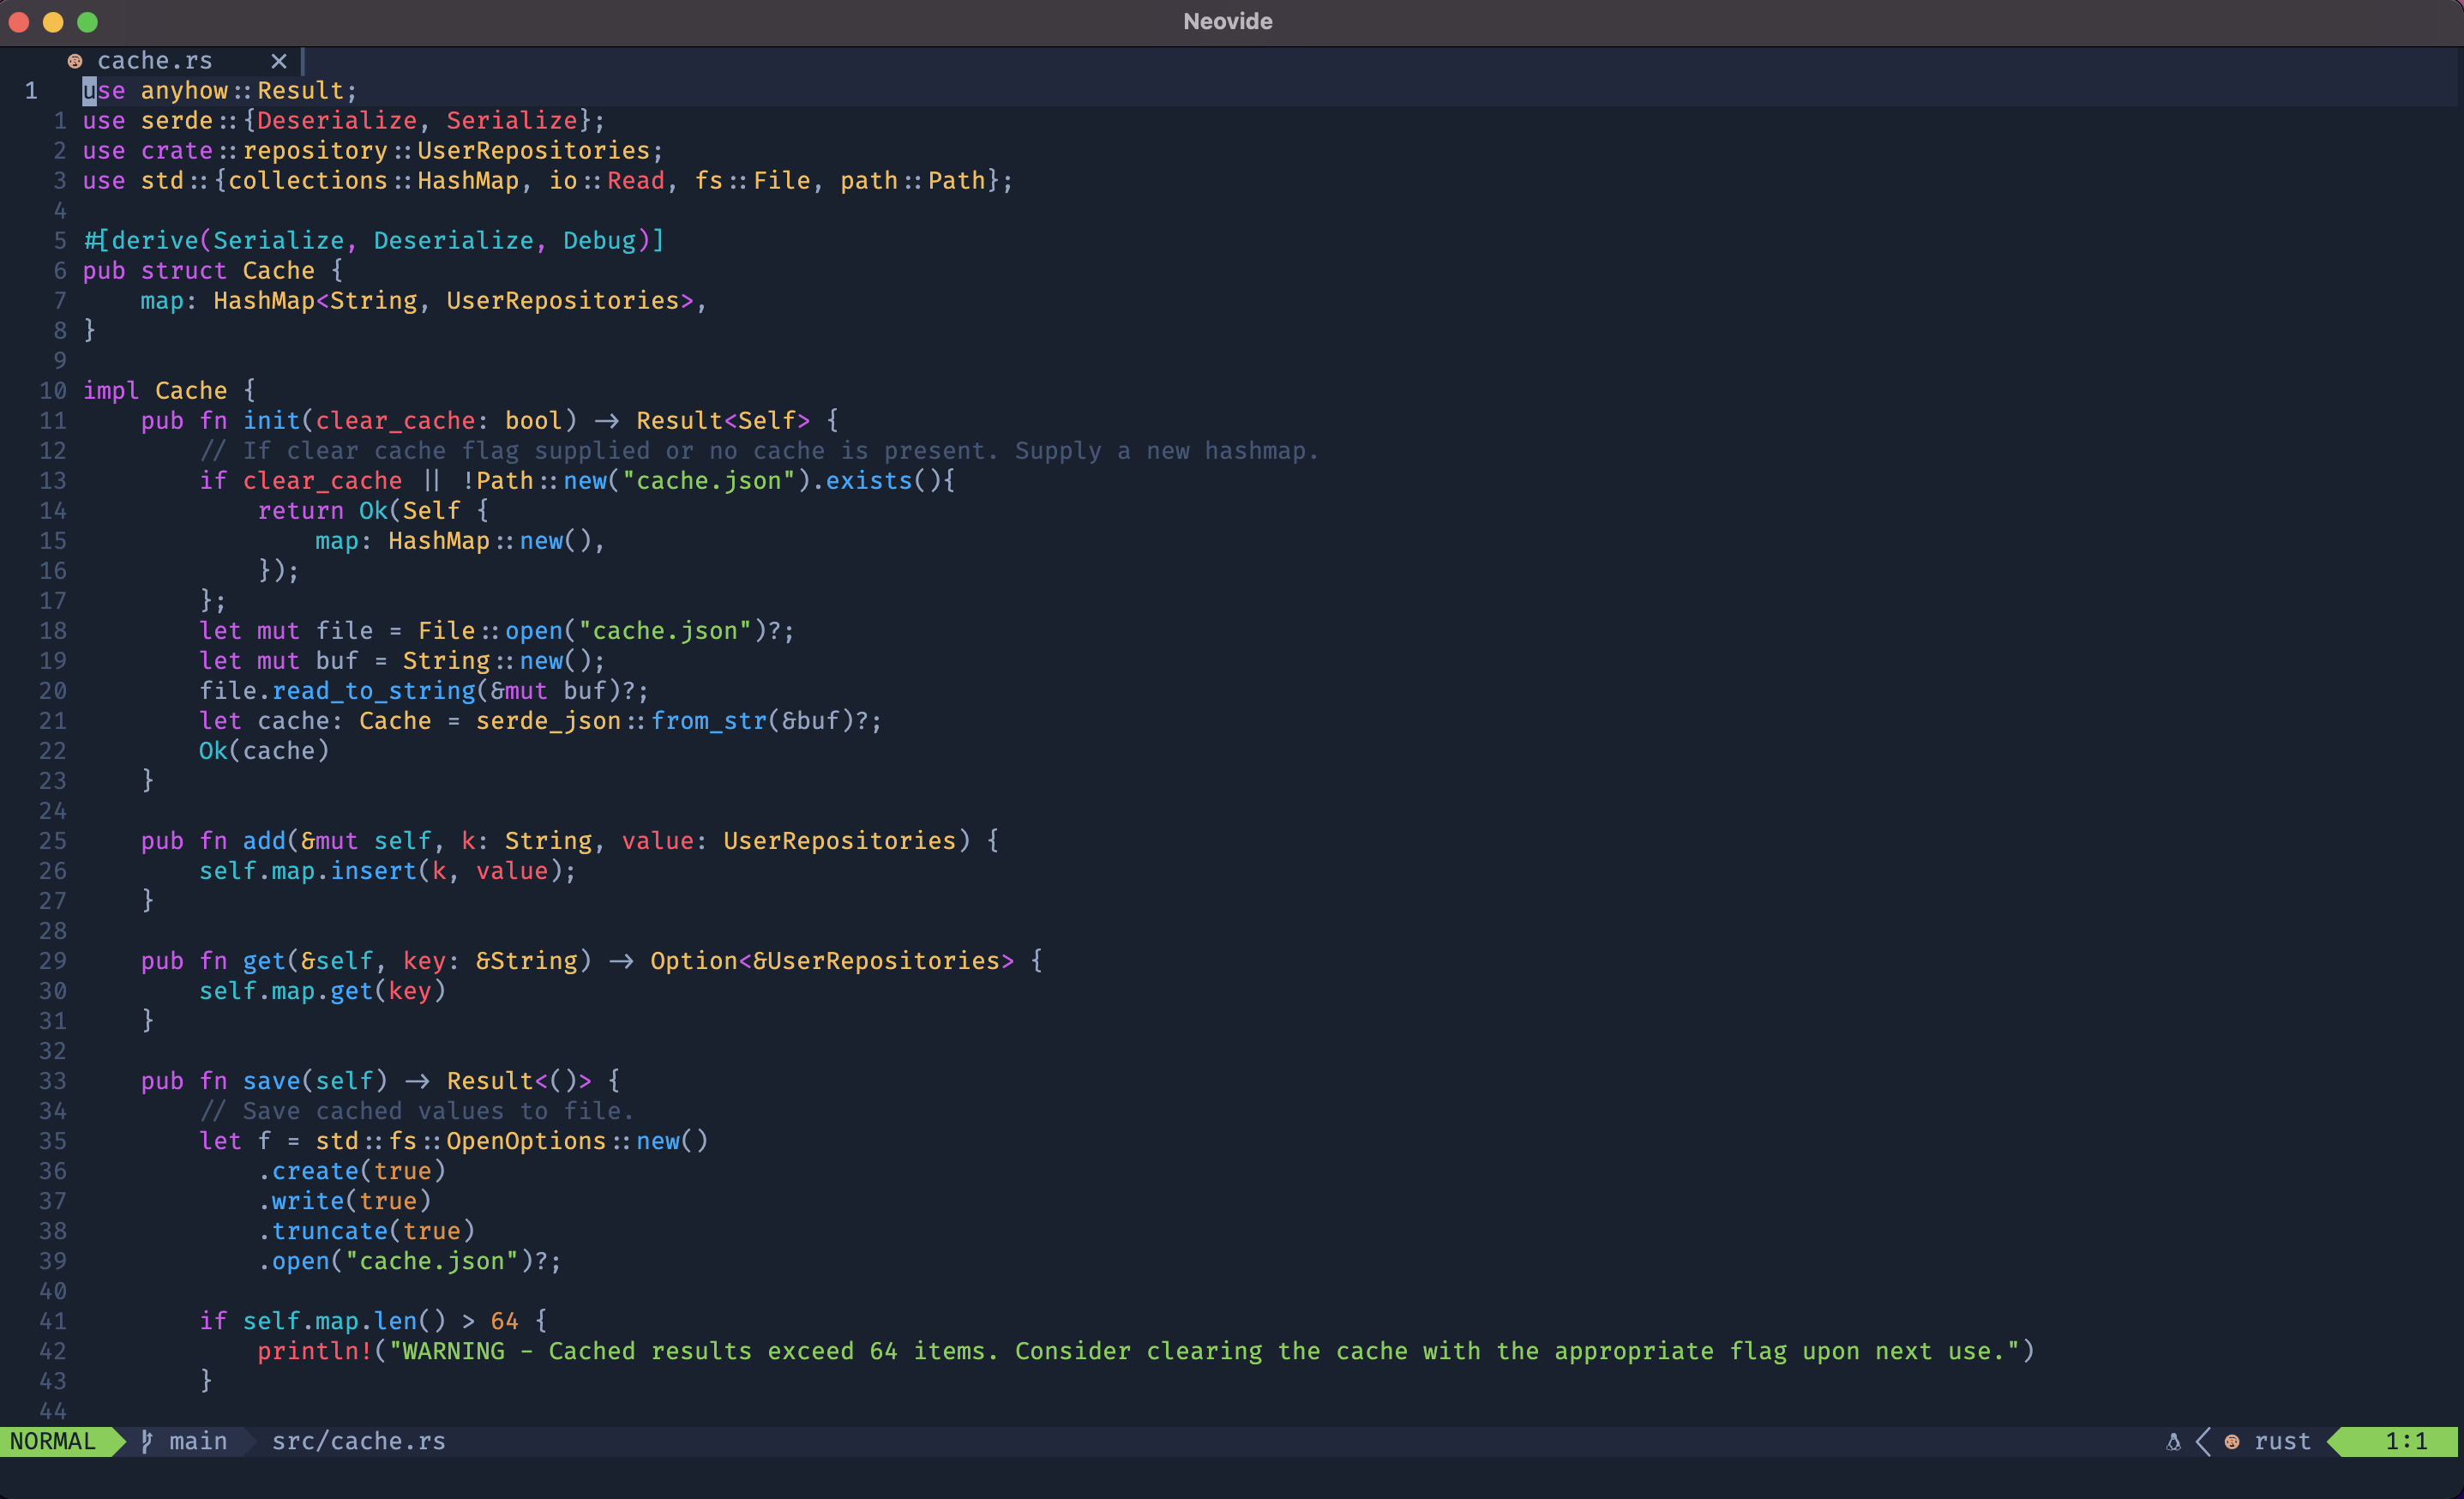
Now the question I asked myself is why would anyone want to go through the pain of setting all of this up, and I think that’s a very valid question. In my opinion, the only reason you should want to make the change is either for the fun of building and customing your IDE to exactly how you want it, or you spend a lot of time switching between different operating systems and you want to have a homogenous developer experience wherever you are. As an added bonus, cloning your config onto a server that you’re working on allows you to have your fully fledged developer experience when SSHing into a server for example.
For me, the primary reason was came about from the aforementioned switching between different operating systems. I’ve spent most my life developing on OSX and building muscle memory using the CMD key when editing text, yet I recently switched jobs where Windows is used as this is how my first week panned out:
Day 1 - Sort out my Windows laptop and download all the relevant software and tools that I’ll need.
Day 2 - Get started on my first ticket, open up VS Code, start (attempting) to write some code. Oh yeh let’s highlight that line right there from start to beginning, on OSX that would be CMD + Shift + Right, so I guess I can do the same on Windows but with Ctrl instead of CMD? Nope. That is definitely not what I intended to do. Guess I’ll try remapping some keys when I get a moment to try and recreate my text editing experience on Windows.
Day 3 - Find out about AutoHotKeys, a way to remap keys and shortcuts, and set up a configuration to remap Alt and Control so that the Control button sits in the same place that the CMD key does on my Mac keyboard. That still doesn’t solve trying to simply highlight a line as Ctrl + Shift + Right is not the same as Cmd + Shift + Right. What’s the equivalent on Windows? The Home button?! Where even is that. Oh great it’s hidden under Fn + Right on my keyboard. Remaps, remaps, more remaps, and I’ve finally got my desired behaviour sorted out.
Day 4 - Time to comment my code, let’s press alt + 3 to get a hashtag. Yeh that’s not an octothorpe mate, try again, but this time with more remaps…
Day 5 - Cry
I exaggerate of course, but I did find that switching from years of using OSX shortcuts to be quite painful. My AHK config is finally at a point where most my keyboards shortcuts are pretty much identical whether I’m on Mac or Windows, but it was fairly painful.
It was at this point that I finally decided to make the switch to Neovim, as most of your commands revolve around keybindings that are fixed, e.g. to enter Insert mode by pressing “i”, it does not matter where I am or what computer I’m, as long as the keyboard is QUERTY it will be the same.
Neovim Installation and Lazy Nvim Config Setup
Now this part is slightly dependant on your OS, so it’s likely better to link the official GitHub repo for this, but for those on OSX, a simple brew install neovim will sort the job out.
From here you can create your nvim config directory and open the default Neovim editor with the following:
mkdir -p ~/.config/nvim
cd ~/.config/nvim
nvim .
And you’ll be greeted with the worlds most incredible developer experience known to mankind (I’ve got some of my config files here, if you’re following along you will not see any files or directories listed):
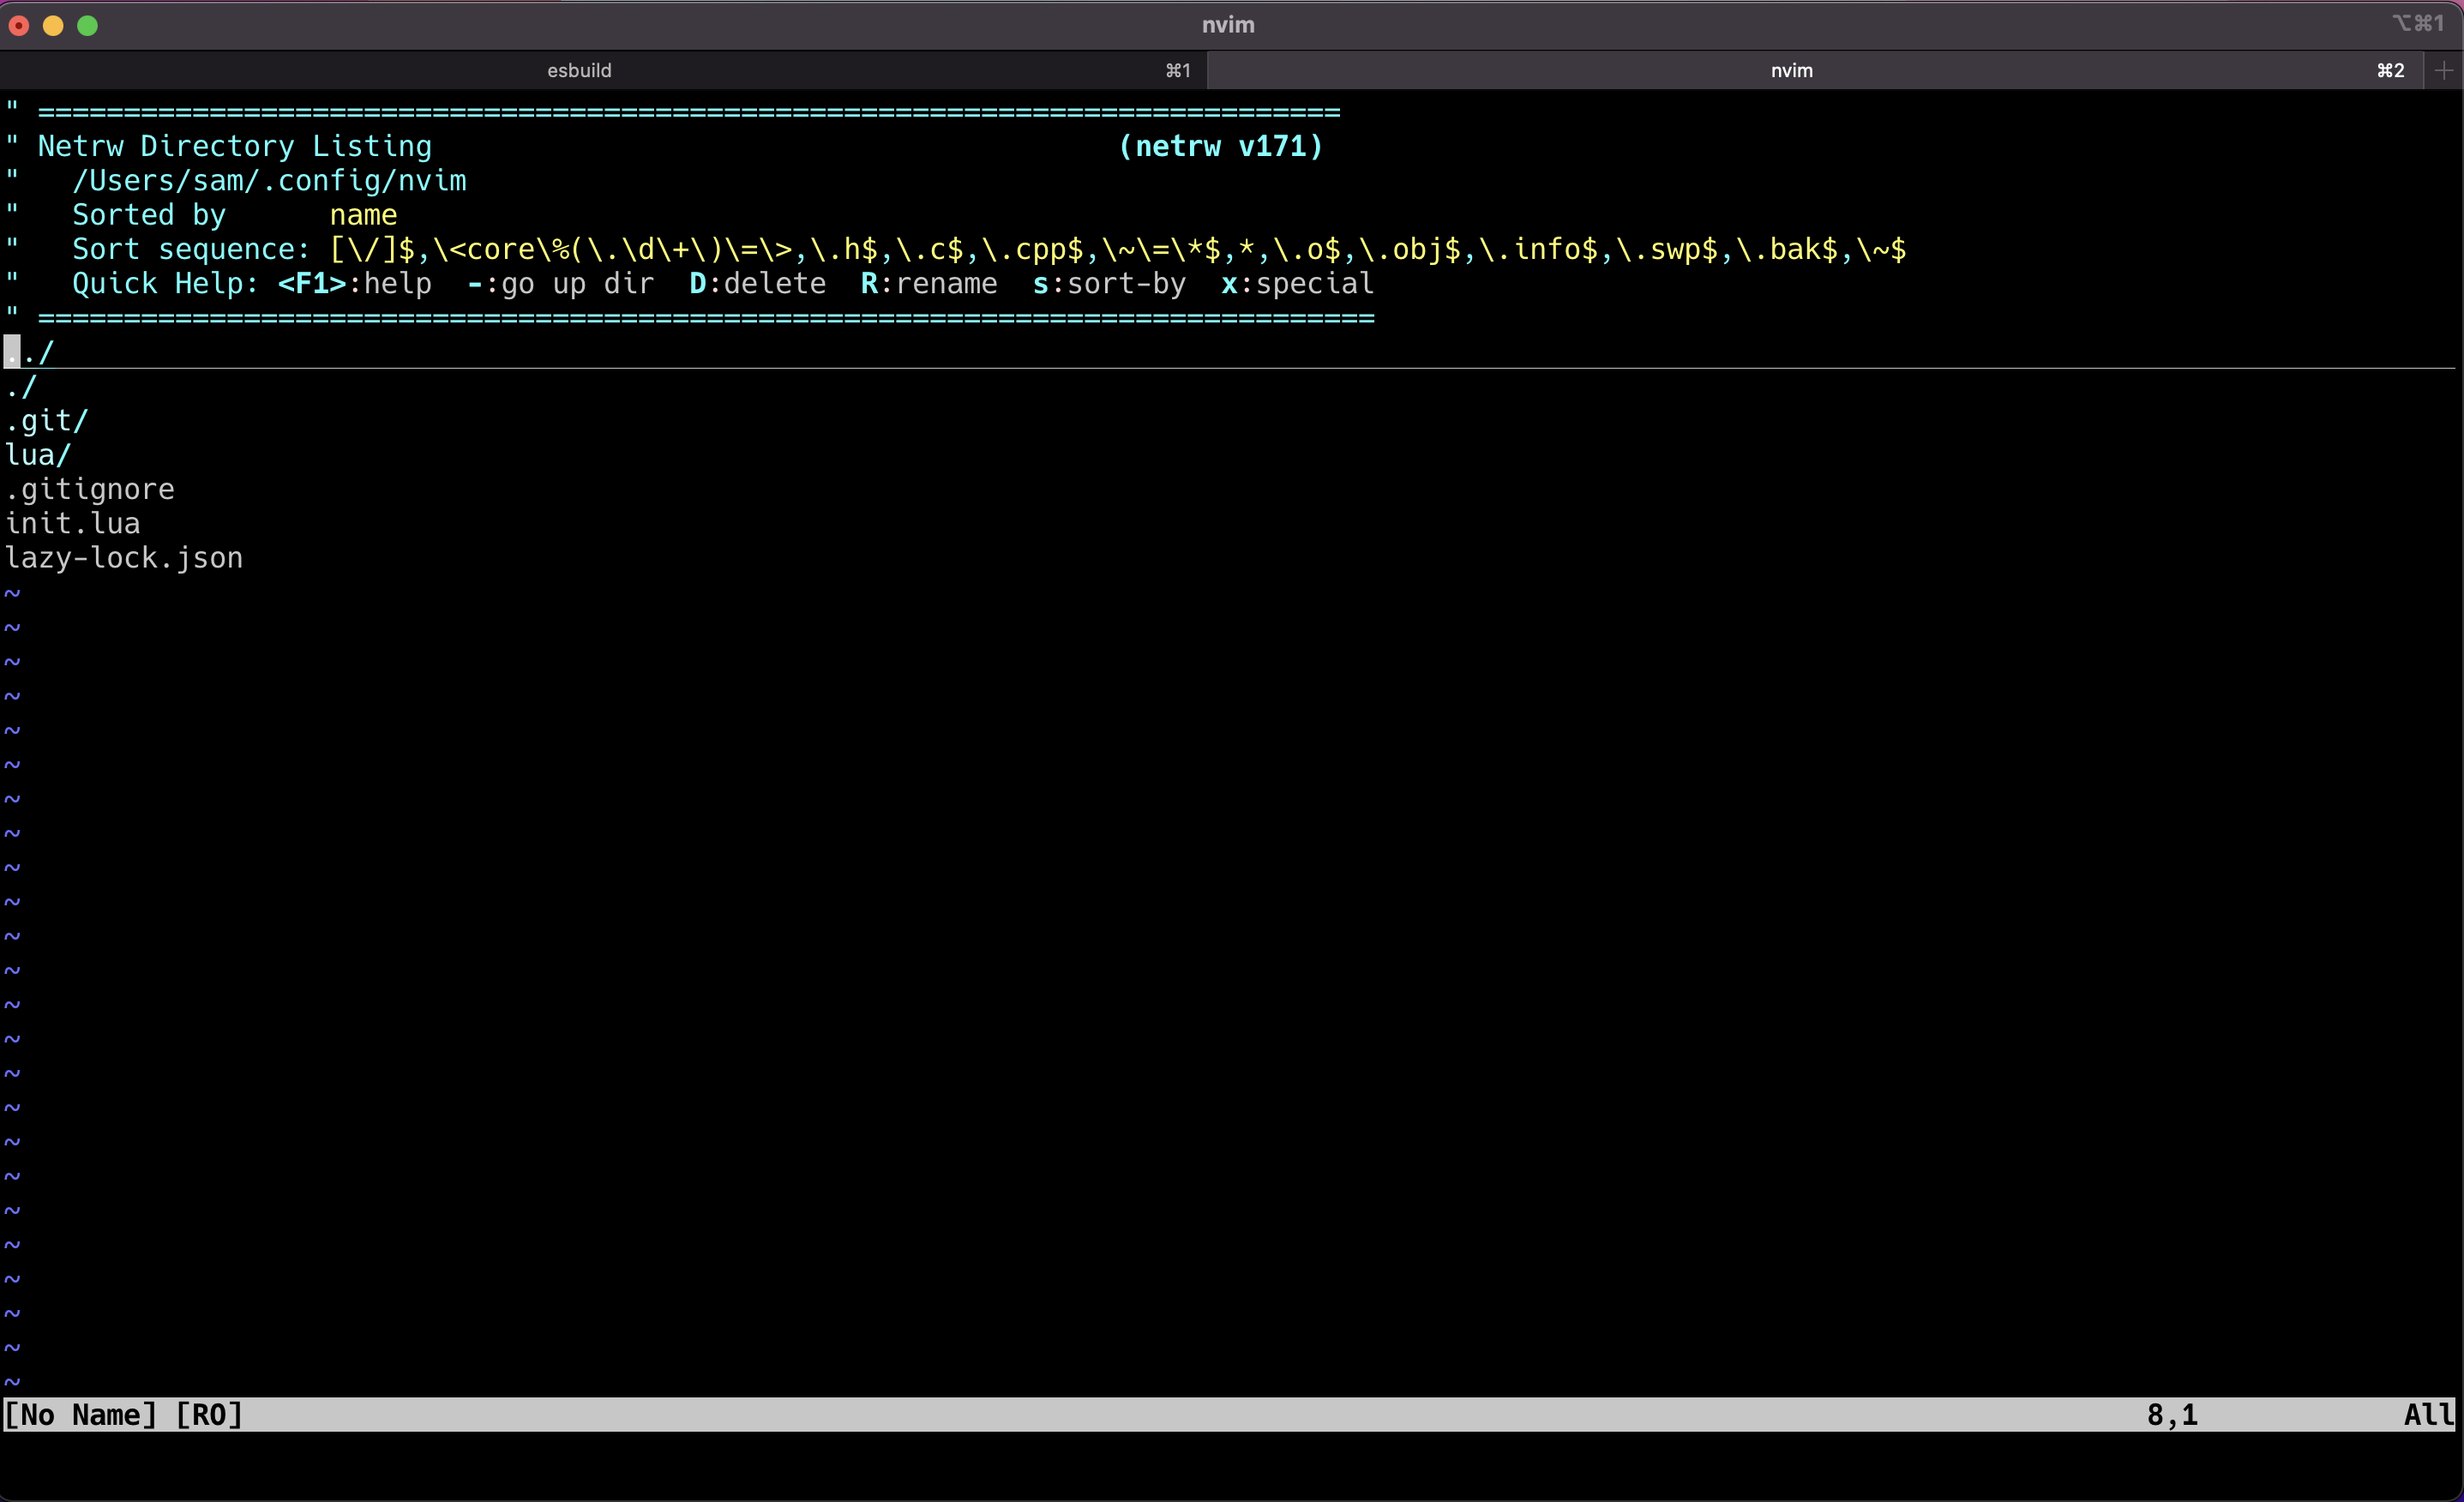
Beautiful, isn’t it?
No it’s horrible, but it’s where we gotta start.
But beforehand, let’s get some of the basics sorted out. Neovim has the benefit of being able to write your configuration in Lua, rather than Vimscript in Vim. And everything starts from the init.lua file at the root of our configurtion.
In the magnficent Netrw view above, we can create our init.lua file by typing % init.lua. Why the percentage sign? I don’t know, let’s just accept it and move on.
Then we can add a quick print statement into our init.lua
-- init.lua
print("Hello, World!")
Save and quit with a quick :wq, re-enter nvim with a speedy nvim ., and low and behold:
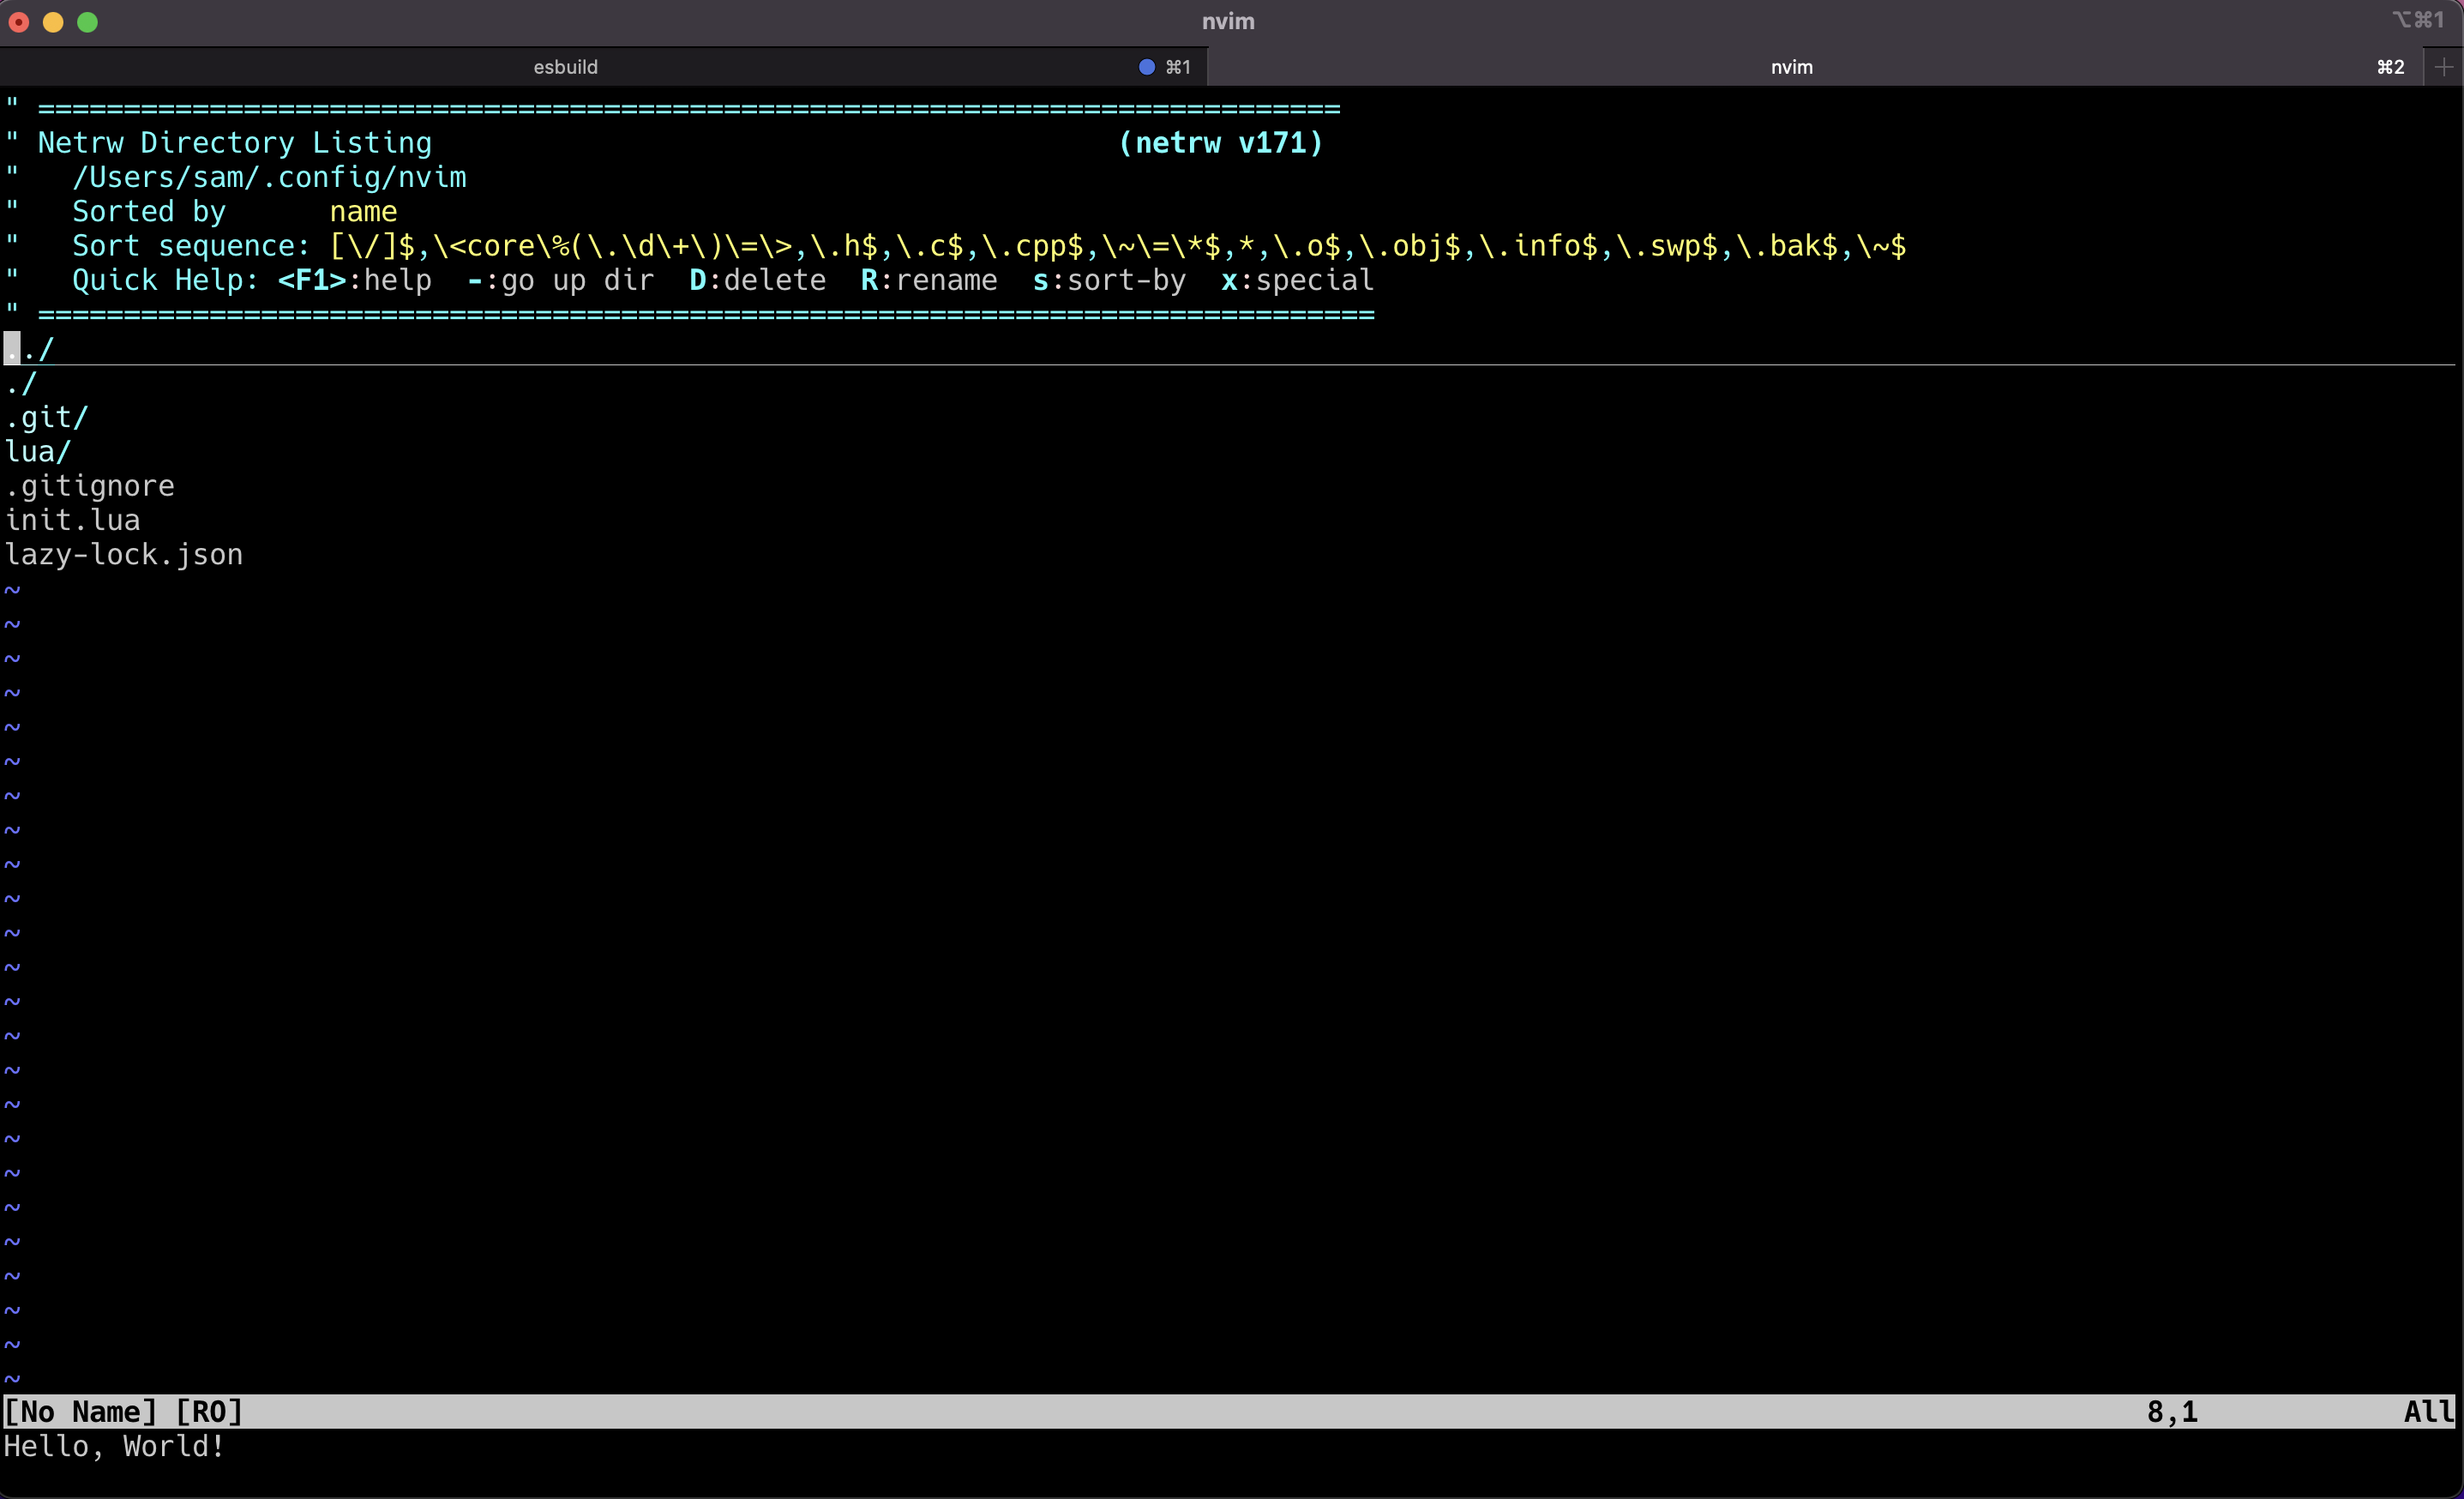
We can see our print statement executed at the bottom.
So our init.lua is executed upon entering Neovim. That’s a great starting point in terms of understanding, the next big leap is adding a package manager to our configuration so that we can add community developed plugins at will.
Lazy.nvim
Now I should probably give a shoutout here to The Primagen who’s video kickstarted my understanding of sorting out a basic configuration using Packer . However, I’ve noticed some movement in the community towards Lazy.nvim (including the author of Packer themselves), so I thought I’d make the plunge into moving my config over to using that instead.
So heading over to the Lazy.nvim repo, the setup instructions are pretty simple to follow, essentially just change your init.lua to the following:
vim.g.mapleader = " " -- I've added this line for now, more details to follow ...
local lazypath = vim.fn.stdpath("data") .. "/lazy/lazy.nvim"
if not vim.loop.fs_stat(lazypath) then
  vim.fn.system({
    "git",
    "clone",
    "--filter=blob:none",
    "https://github.com/folke/lazy.nvim.git",
    "--branch=stable", -- latest stable release
    lazypath,
  })
end
vim.opt.rtp:prepend(lazypath)

require("lazy").setup({
})
Now exit Neovim, re-enter, and it should seem to hang for a moment as it’s cloning the package manager, then run :checkhealth lazy to see that all systems are go. N.B. If you previously have played around with a configuration, you may need to delete your old packages by running rm -rf ~/.local/share/nvim.
Right so how do we add plugins? The line require("lazy").setup() takes one non-optional argument, a Lua table, which from my basic understanding you can treat like a Python dictionary or Hashmap.
Naturally, the most important plugin, that we must add first is a colour scheme. I’m a bit of a sucker for one-dark themes, so we can add the colour scheme as follows within the table supplied to require("lazy").setup():
require("lazy").setup({
    {
    "navarasu/onedark.nvim", -- Github Repo Name
    lazy = false, -- Set lazy to false as we do not want to Lazy load this, we want it to always load
    priority = 1000, -- Set priority to an arbitrary high number to ensure that this package is loaded very early on in the startup sequence
    config = function() -- Add our configuration to run when the extension is loaded:
      require("onedark").setup( {
              style = "deep" -- Specific colour style within one-dark
          })
      vim.cmd([[colorscheme onedark]]) -- And finally run a vim command to set the color scheme to onedark
    end
  }
})
Quit, restart, and watch Lazy.nvim download our theme, open up our init.lua file, and see the beauty of one dark applied:
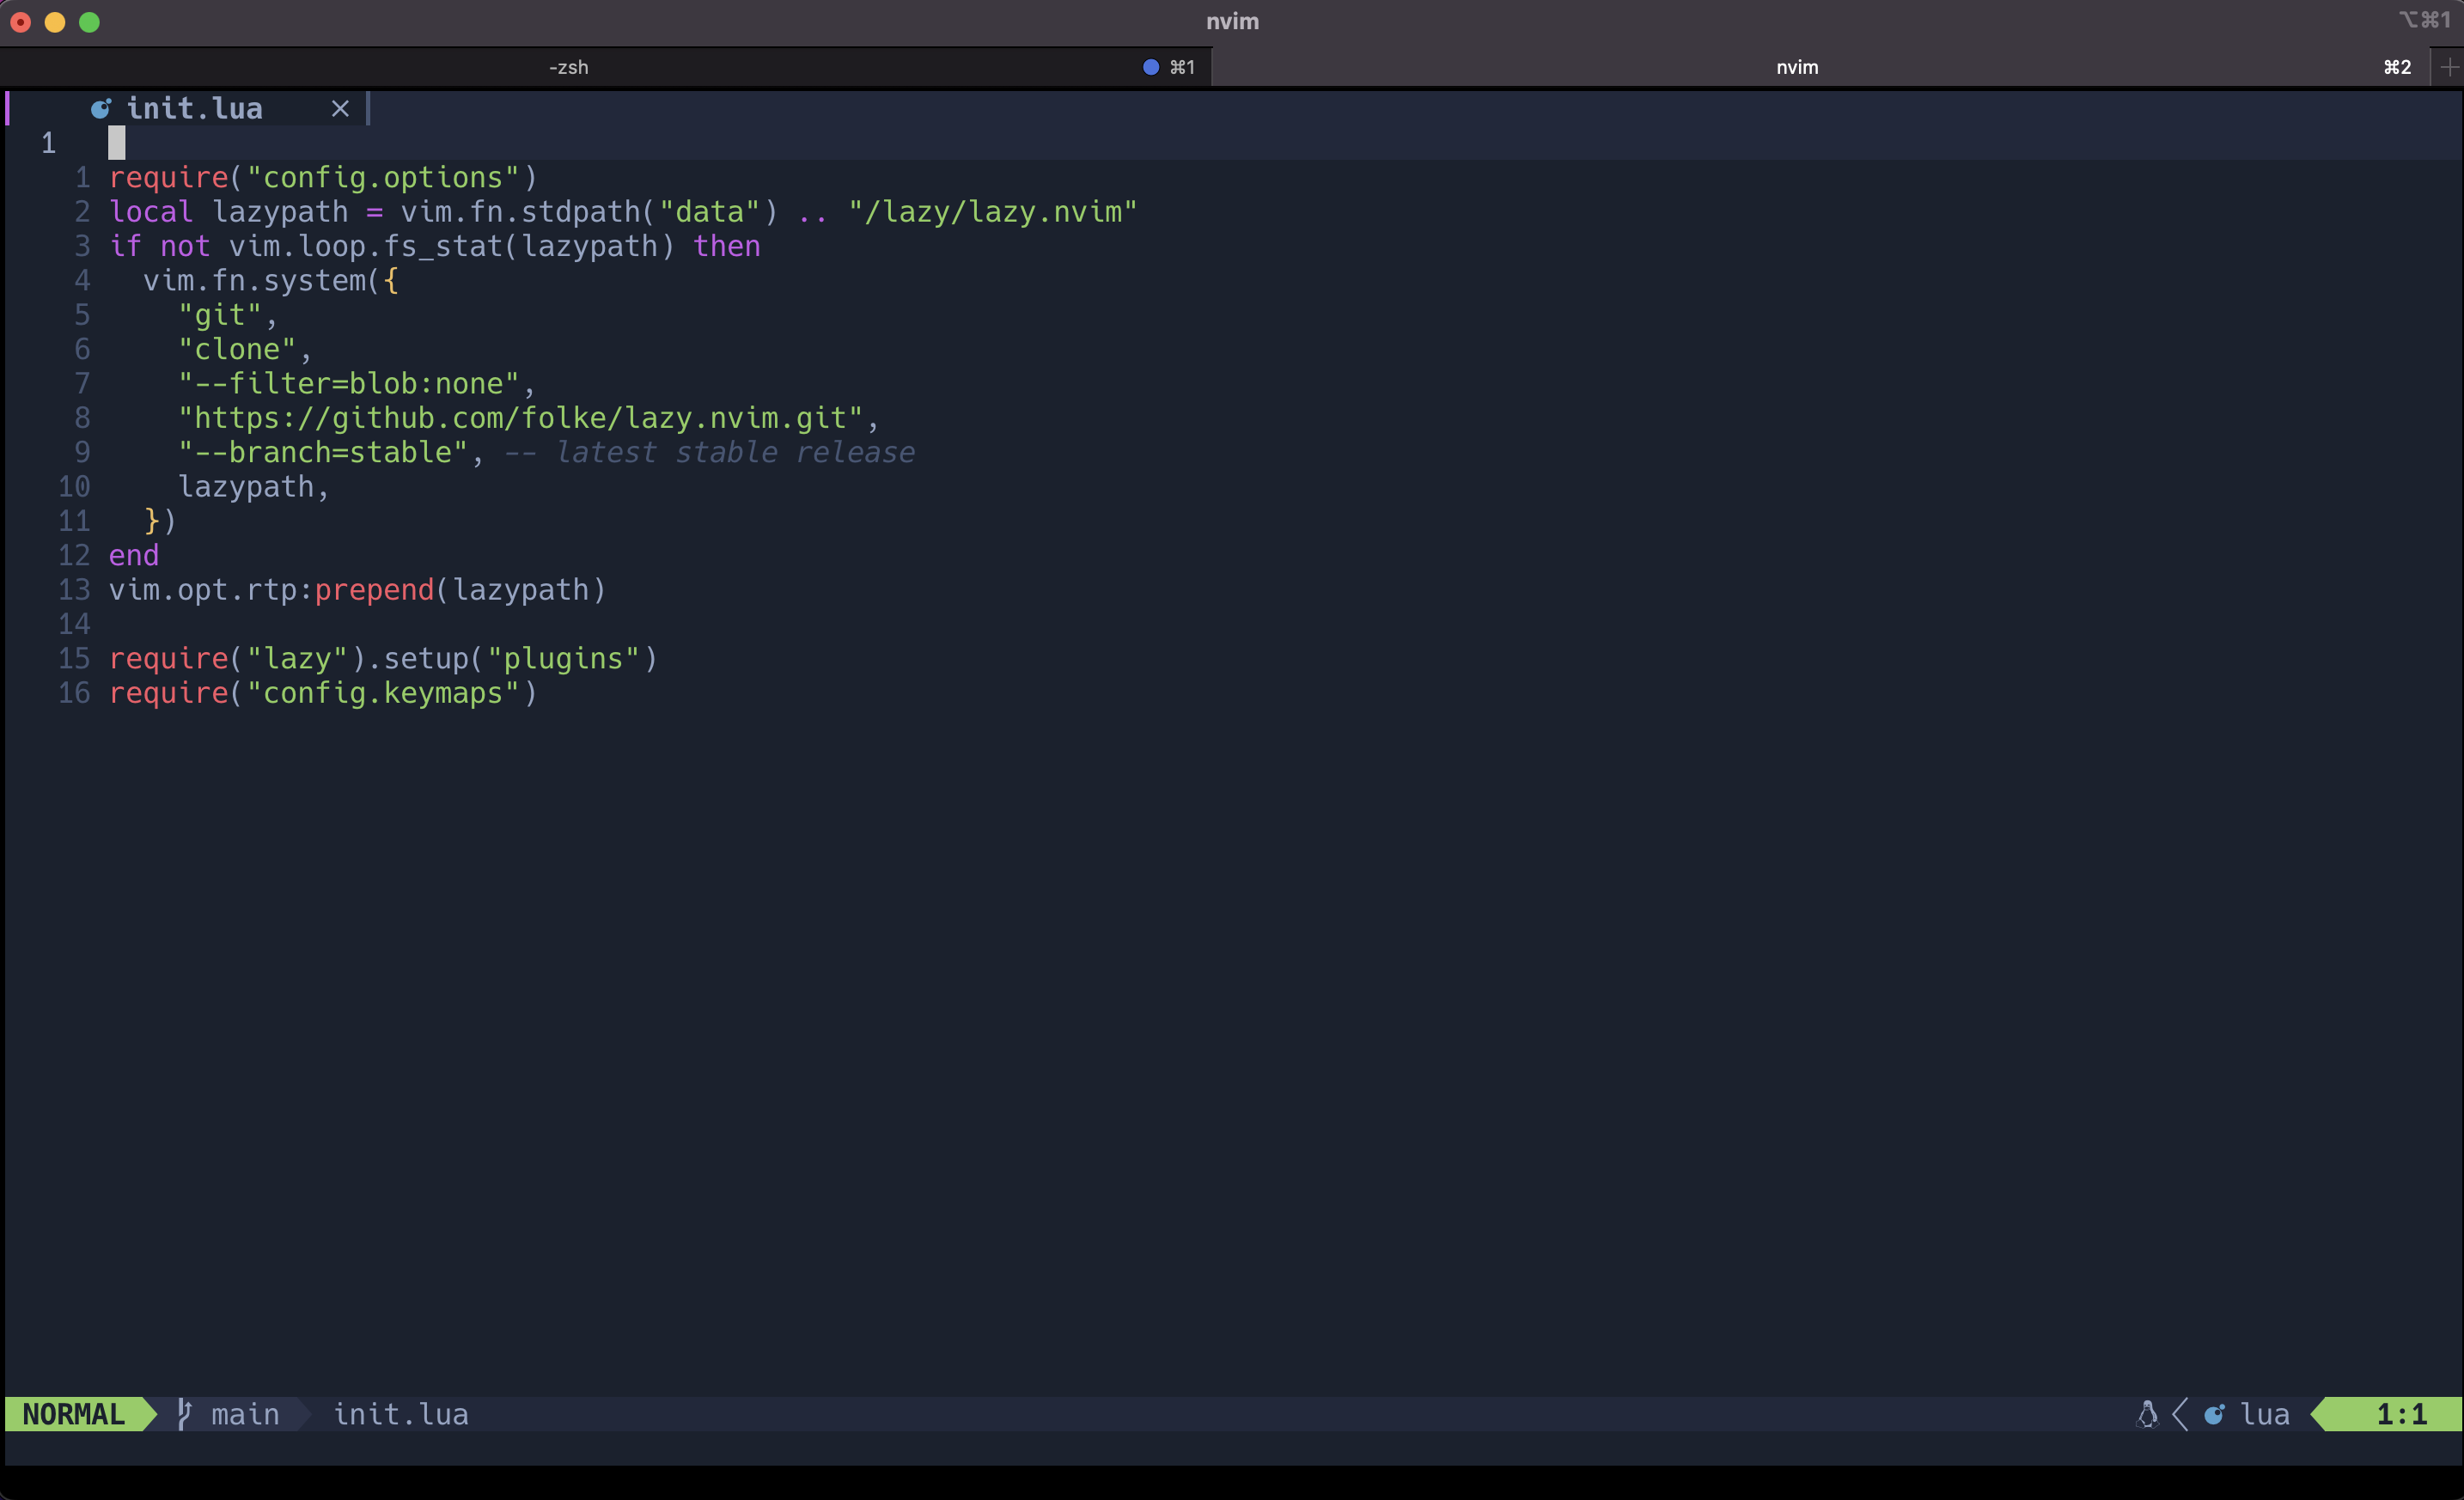
Everyone knows that a proper theme is the most important part of an IDE, so technically we’re halfway there…right?
Some Core Plugins
There are a couple of main things to get us up and running, the best place to start for me was a fuzzy file finder to avoid having to use the default Netrc navigation system (although funnily enough I find it quite good). Telescope.nvim is a fantastic plugin for this, as is fzf.vim. I’ve opted for telescope here.
The repo for telescope kindly shows us the installation process for it, such that our setup function becomes:
require("lazy").setup({
    {
    "navarasu/onedark.nvim",
    lazy = false,
    priority = 1000,
    config = function()
      require("onedark").setup( {
              style = "deep"
          })
      vim.cmd([[colorscheme onedark]])
    end
  }
  {
    "nvim-telescope/telescope.nvim", tag = "0.1.1",
    dependencies = {"nvim-lua/plenary.nvim"}
  }
})
Once again, quit and reopen Nvim, watch as Lazy.nvim installs telescope, then run the command :Telescope find_files to see an awesome popup window which allows you to search for and open files easily, awesome stuff:
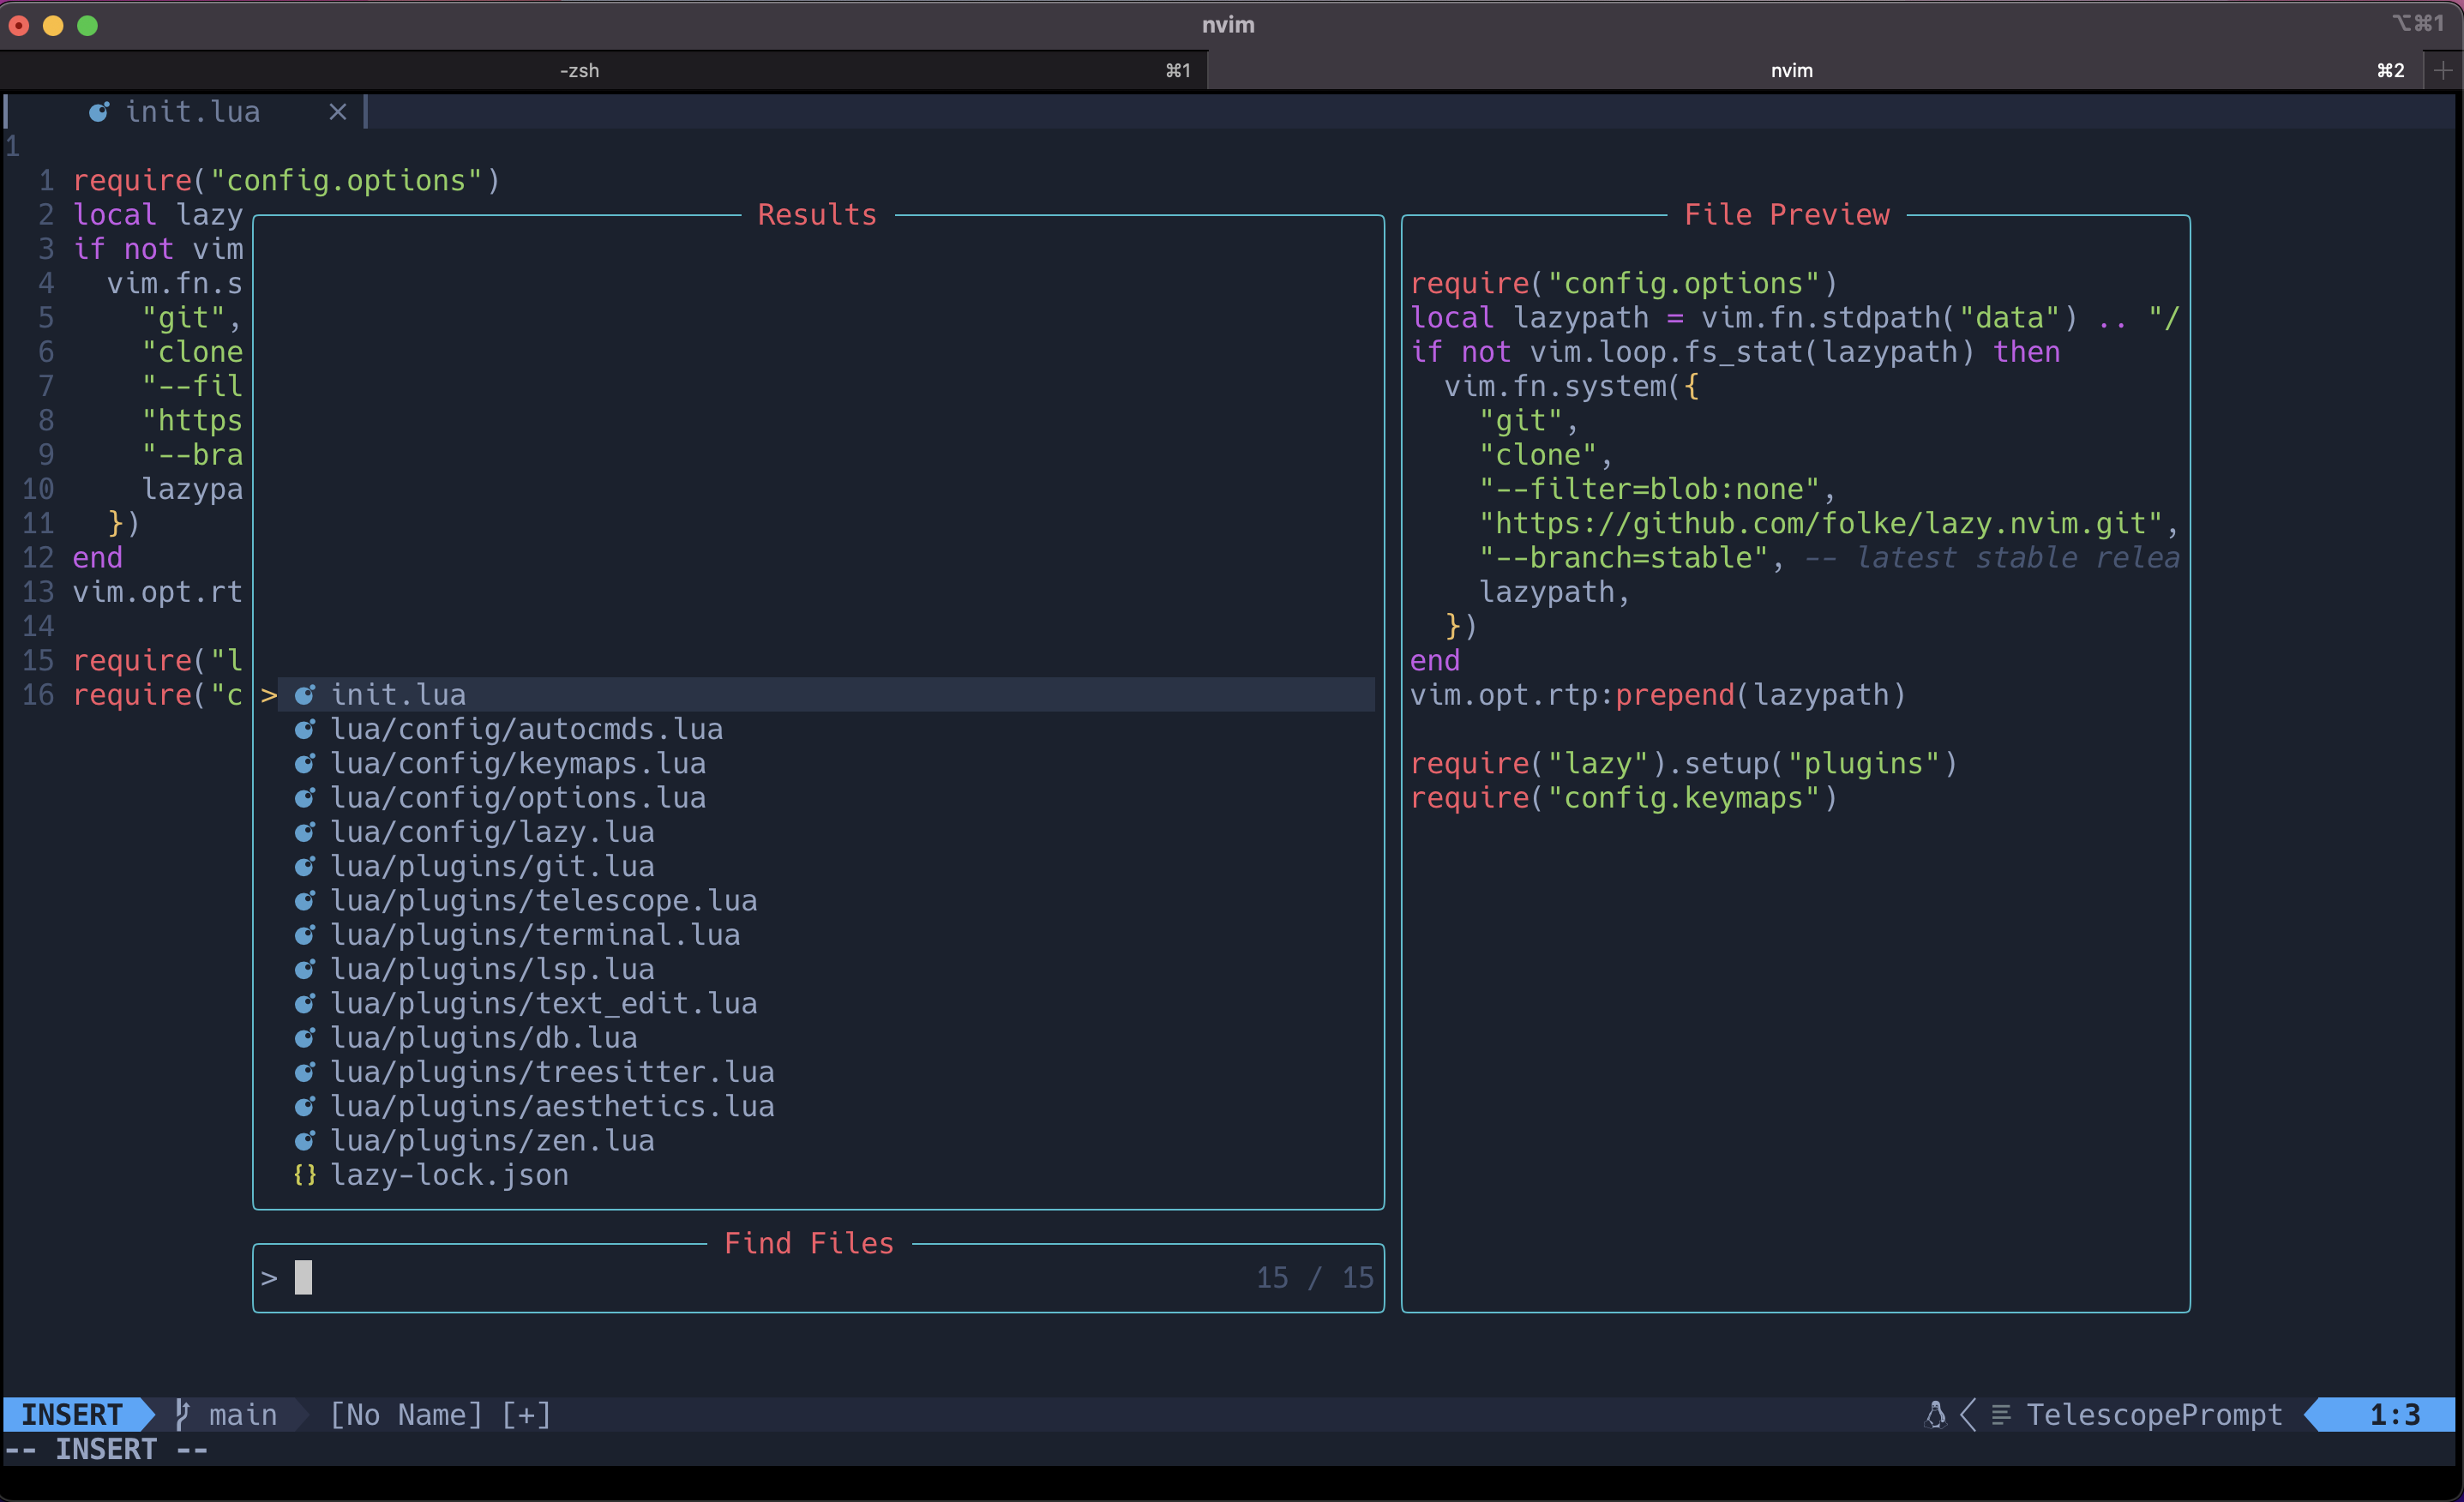
Okay that’s great for finding a file when we know the name, what if we want to explore a large project, thankfully there is a nice telescope extension for this (or another alternative is nvim-tree), but I personally prefer the popup that telescope gives. So let’s add it.
require("lazy").setup({
  -- Snipped
  {"nvim-telescope/telescope-file-browser.nvim"},
})
As always, quit and reopen, watch lazy install telescope-file-browser and now we should be able to run :Telescope file_browser to get a file explorer.
Except, it doesn’t work. We need add the setup-function as well to the bottom of our init.lua file:
require("telescope").load_extension("file_browser")(Close and reopen again) and everything seems to be in order when running :Telescope file_browser:
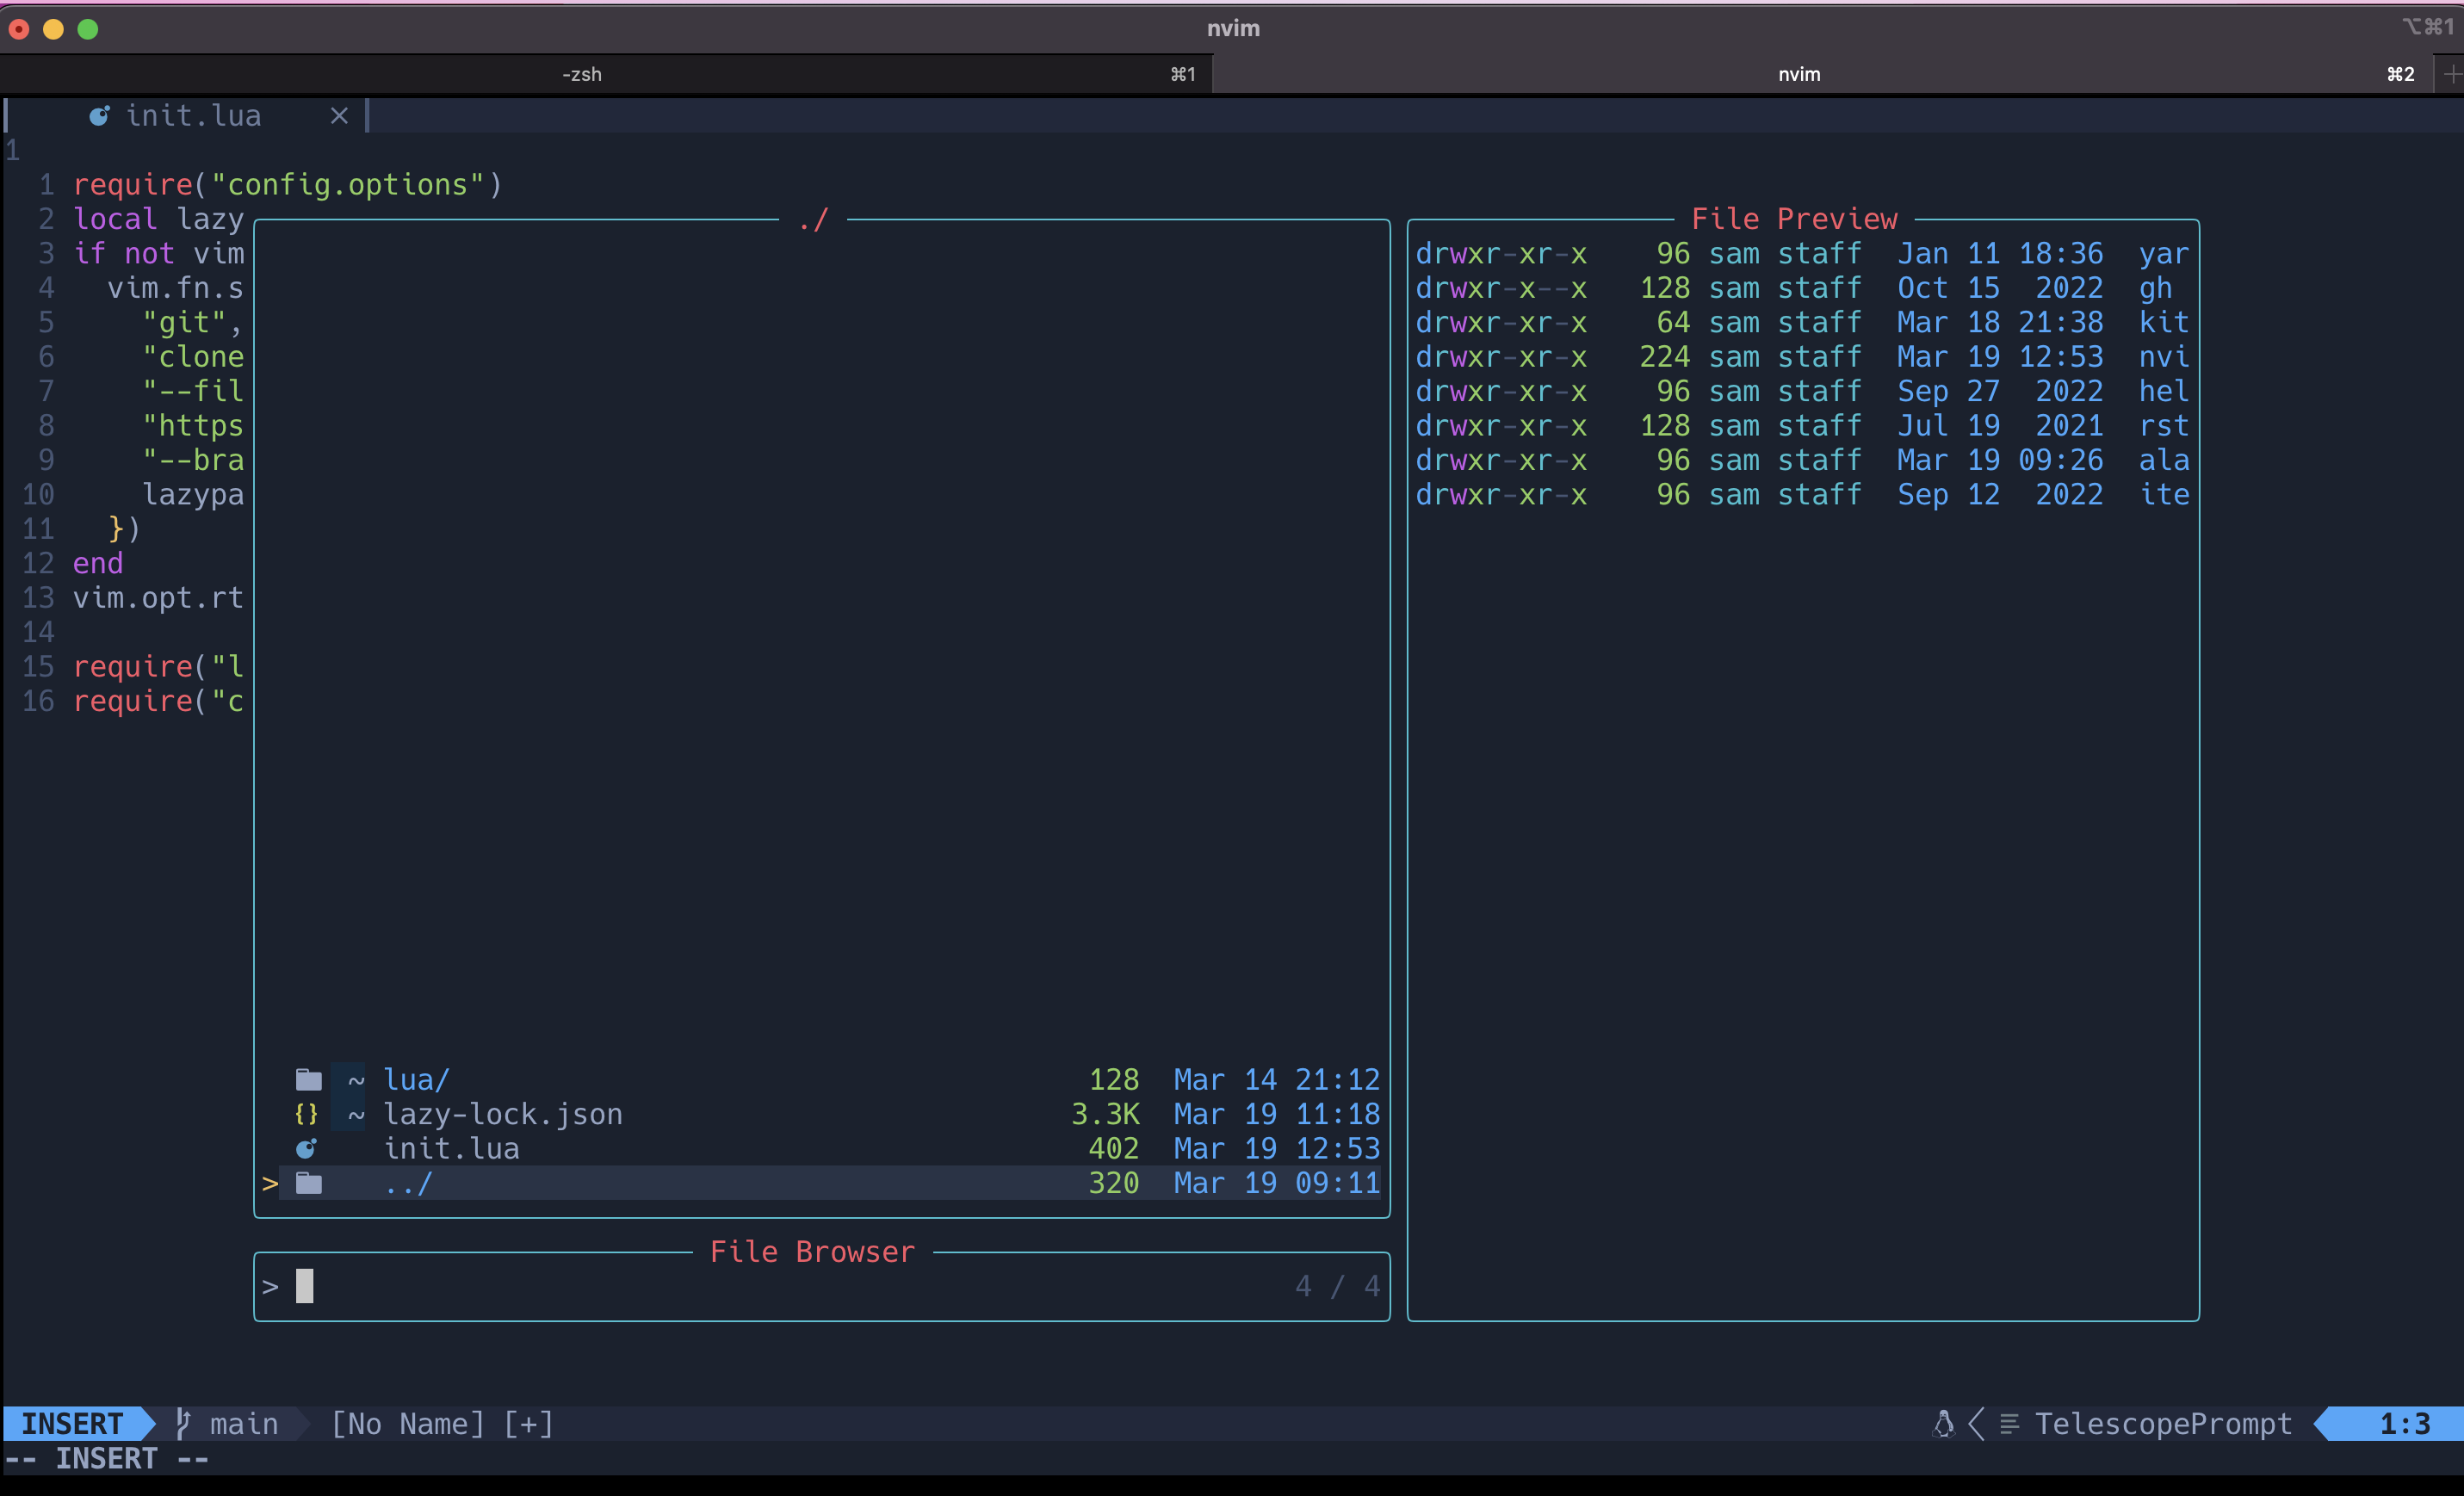
There is one minor issue that is unfolding as we add more plugins. Our init.lua is growing and there is no modularisation of what we’re doing. Let’s sort that out.
Startup sequence and structuring plugins
Lazy.nvim notes that it takes over the complete startup sequence for Neovim for more flexibility and performance, as such it replace step 10 of the neovim initialisation sequence here with the following steps:
- All the plugins’ init() functions are executed
- All plugins with lazy=false are loaded. This includes sourcing /plugin and /ftdetect files. (/after will not be sourced yet)
- All files from /plugin and /ftdetect directories in you rtp are sourced (excluding /after)
- All /after/plugin files are sourced (this includes /after from plugins)
So the plan is to essentially have a file for each of our plugins, or at least grouping our plugins under a common theme, all residing within lua/plugins.
Let’s crack on, with porting our telescope plugins into a telescope.lua file, and our theme into a theme.lua file:
-- nvim/lua/plugins/telescope.lua:

return {
    { 'nvim-telescope/telescope.nvim', tag = '0.1.1', dependencies = { "nvim-lua/plenary.nvim"} },
    {
        'nvim-telescope/telescope-file-browser.nvim',
        config = function()
            require('telescope').load_extension("file_browser")
        end
    }
}

-- nvim/lua/plugins/theme.lua


return {
    "navarasu/onedark.nvim",
    lazy = false,
    priority = 1000,
    config = function()
      require("onedark").setup( {
              style = "deep"
          })
      vim.cmd([[colorscheme onedark]])
    end
}
And there we go! A quick :wq and nvim . and we can confirm that everything is as before, except nice and modularised.
Now the only thing that is annoying at this point is that we don’t want to be typing, for example, :Telescope find_files everytime we want to search for files. Thankfully, creating your own custom keymaps exist for this.
There is a very common pattern found in all Neovim configs whereby you set a key to be your “leader”, and then you have mappings set up to follow leader and execute a certain command. For example, pressing your leader key followed by “ff” might actually execute :Telescope find_files. If you set your eyes back to the initial configuration of lazy.nvim above, you’ll notice the line vim.g.mapleader = " ", and this is setting the space bar to our leader key.
Remapping keys in Lazy.nvim is simple, we just add a new nested table under the key “keys” within our Lua table for a given plugin, and away we go:
-- nvim/lua/plugins/telescope.lua:

return {
    { 'nvim-telescope'/telescope.nvim', tag = '0.1.1', dependencies = { "nvim-lua/plenary.nvim'} },
    {
        'nvim-telescope/telescope-file-browser.nvim',
        keys = {
            {   -- leader -> f -> e to run the command Telescope file_browser followed by <cr> (carriage return?)
                "<leader>fe",
                :<cmd>Telescope file_browser<cr>",
                desc = "Explore Files"
            }
        },
        config = function()
            require('telescope').load_extension("file_browser")
        end
    }
}
Now pressing leader -> f -> e will launch our file explorer!
At this point, if I’m being honest, all this config does is essentially provide a glorified version of Notepad with some extra functionality, how do we actually move towards being productive and writing code? Enter LSP.
LSP
The Language Server Protocol was originally developed by Microsoft for VS code which is now an open standard as of 2016, giving programmers access to features such as code completion, syntax highlighting, errors etc.
I must admit in past I had some serious difficulty setting up my LSP in Neovim, especially when it came to getting inlay hints in Rust.
However I stumbled across the plugin LSP-zero which essentially bundles together everything you need in a small configuration.
-- lua/plugins/lsp.lua
{
  'VonHeikemen/lsp-zero.nvim',
  branch = 'v1.x',
  dependencies = {
    -- LSP Support
    {'Neovim/nvim-lspconfig'},             -- Required
    {'williamboman/mason.nvim'},           -- Optional
    {'williamboman/mason-lspconfig.nvim'}, -- Optional

    -- Autocompletion
    {'hrsh7th/nvim-cmp'},         -- Required
    {'hrsh7th/cmp-nvim-lsp'},     -- Required
    {'hrsh7th/cmp-buffer'},       -- Optional
    {'hrsh7th/cmp-path'},         -- Optional
    {'saadparwaiz1/cmp_luasnip'}, -- Optional
    {'hrsh7th/cmp-nvim-lua'},     -- Optional

    -- Snippets
    {'L3MON4D3/LuaSnip'},             -- Required
    {'rafamadriz/friendly-snippets'}, -- Optional
  }
  config = function()
      local lsp = require('lsp-zero').preset({
              name = 'minimal',
              set_lsp_keymaps = true,
              manage_nvim_cmp = true,
              suggest_lsp_servers = false,
              })

      -- (Optional) Configure lua language server for Neovim
      lsp.nvim_workspace()

      lsp.setup()
  end
}
And that is it! I should note that this configuration uses a plugin called Mason under the hood, if you want to look at all the possible LSP installs you can make with Mason, type :Mason and you’ll be greeted with the following popup:
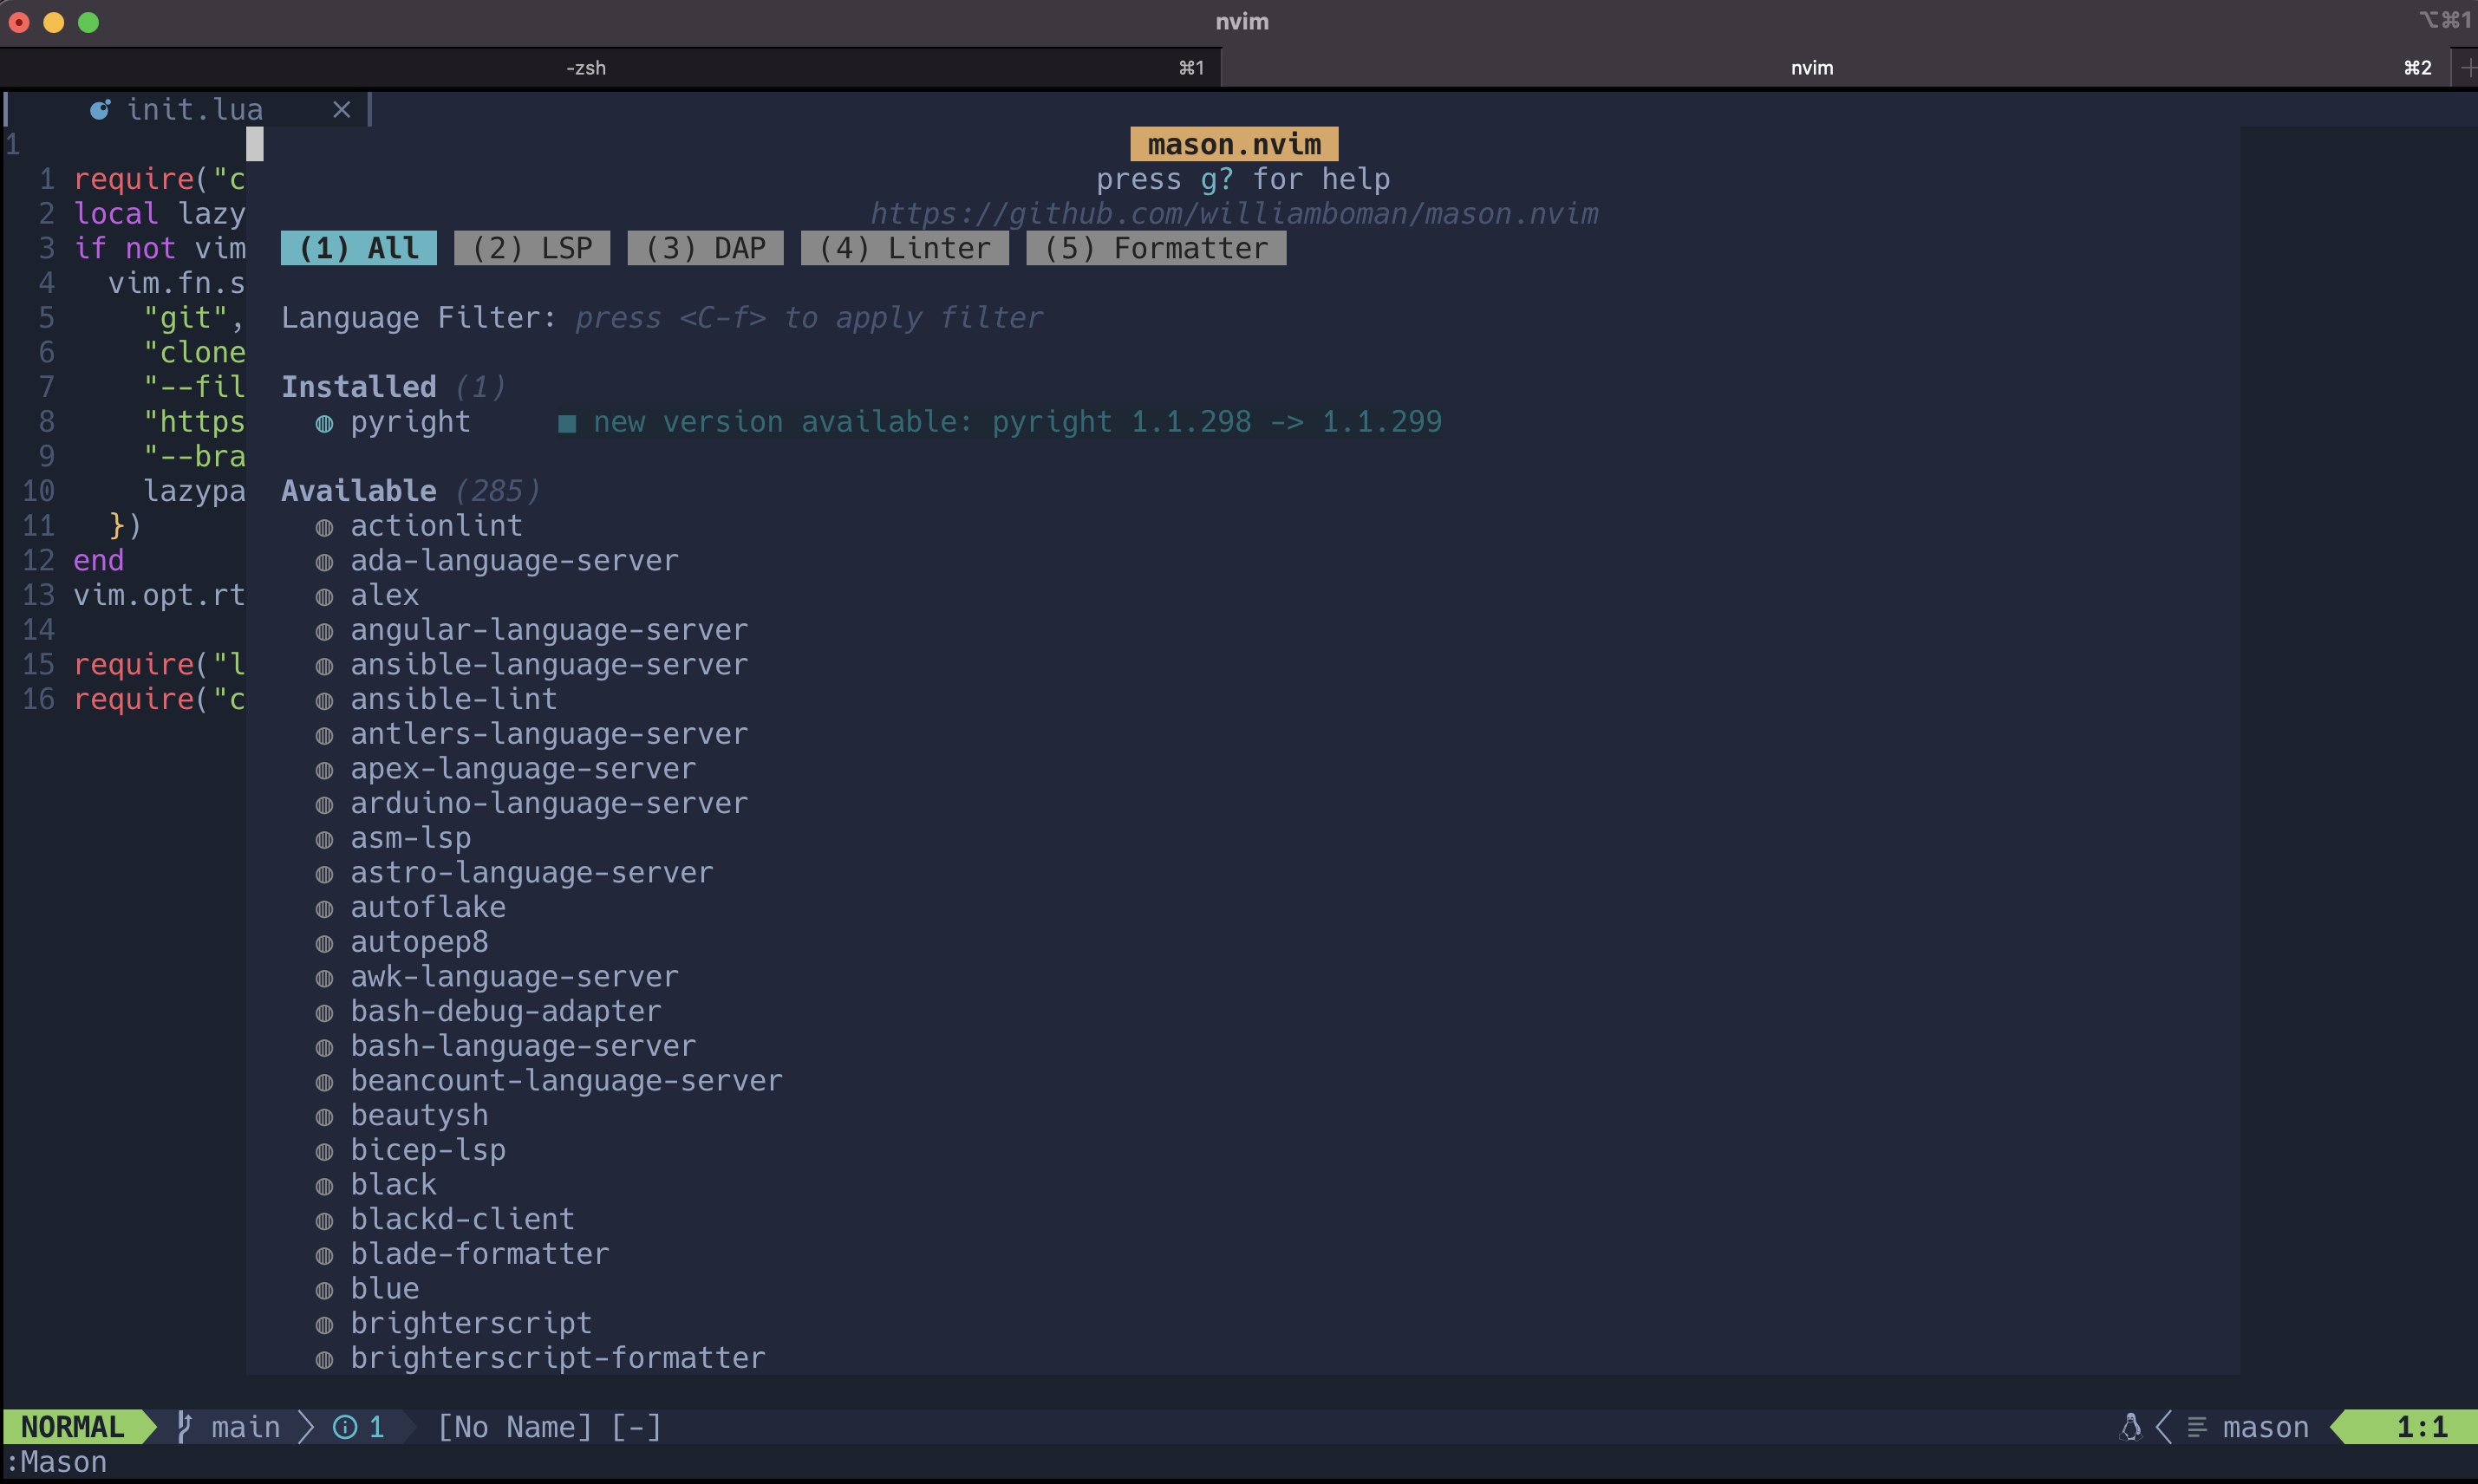
And as you can see, I have a pyright language server installed, so let’s check it out what it can do in a python file:
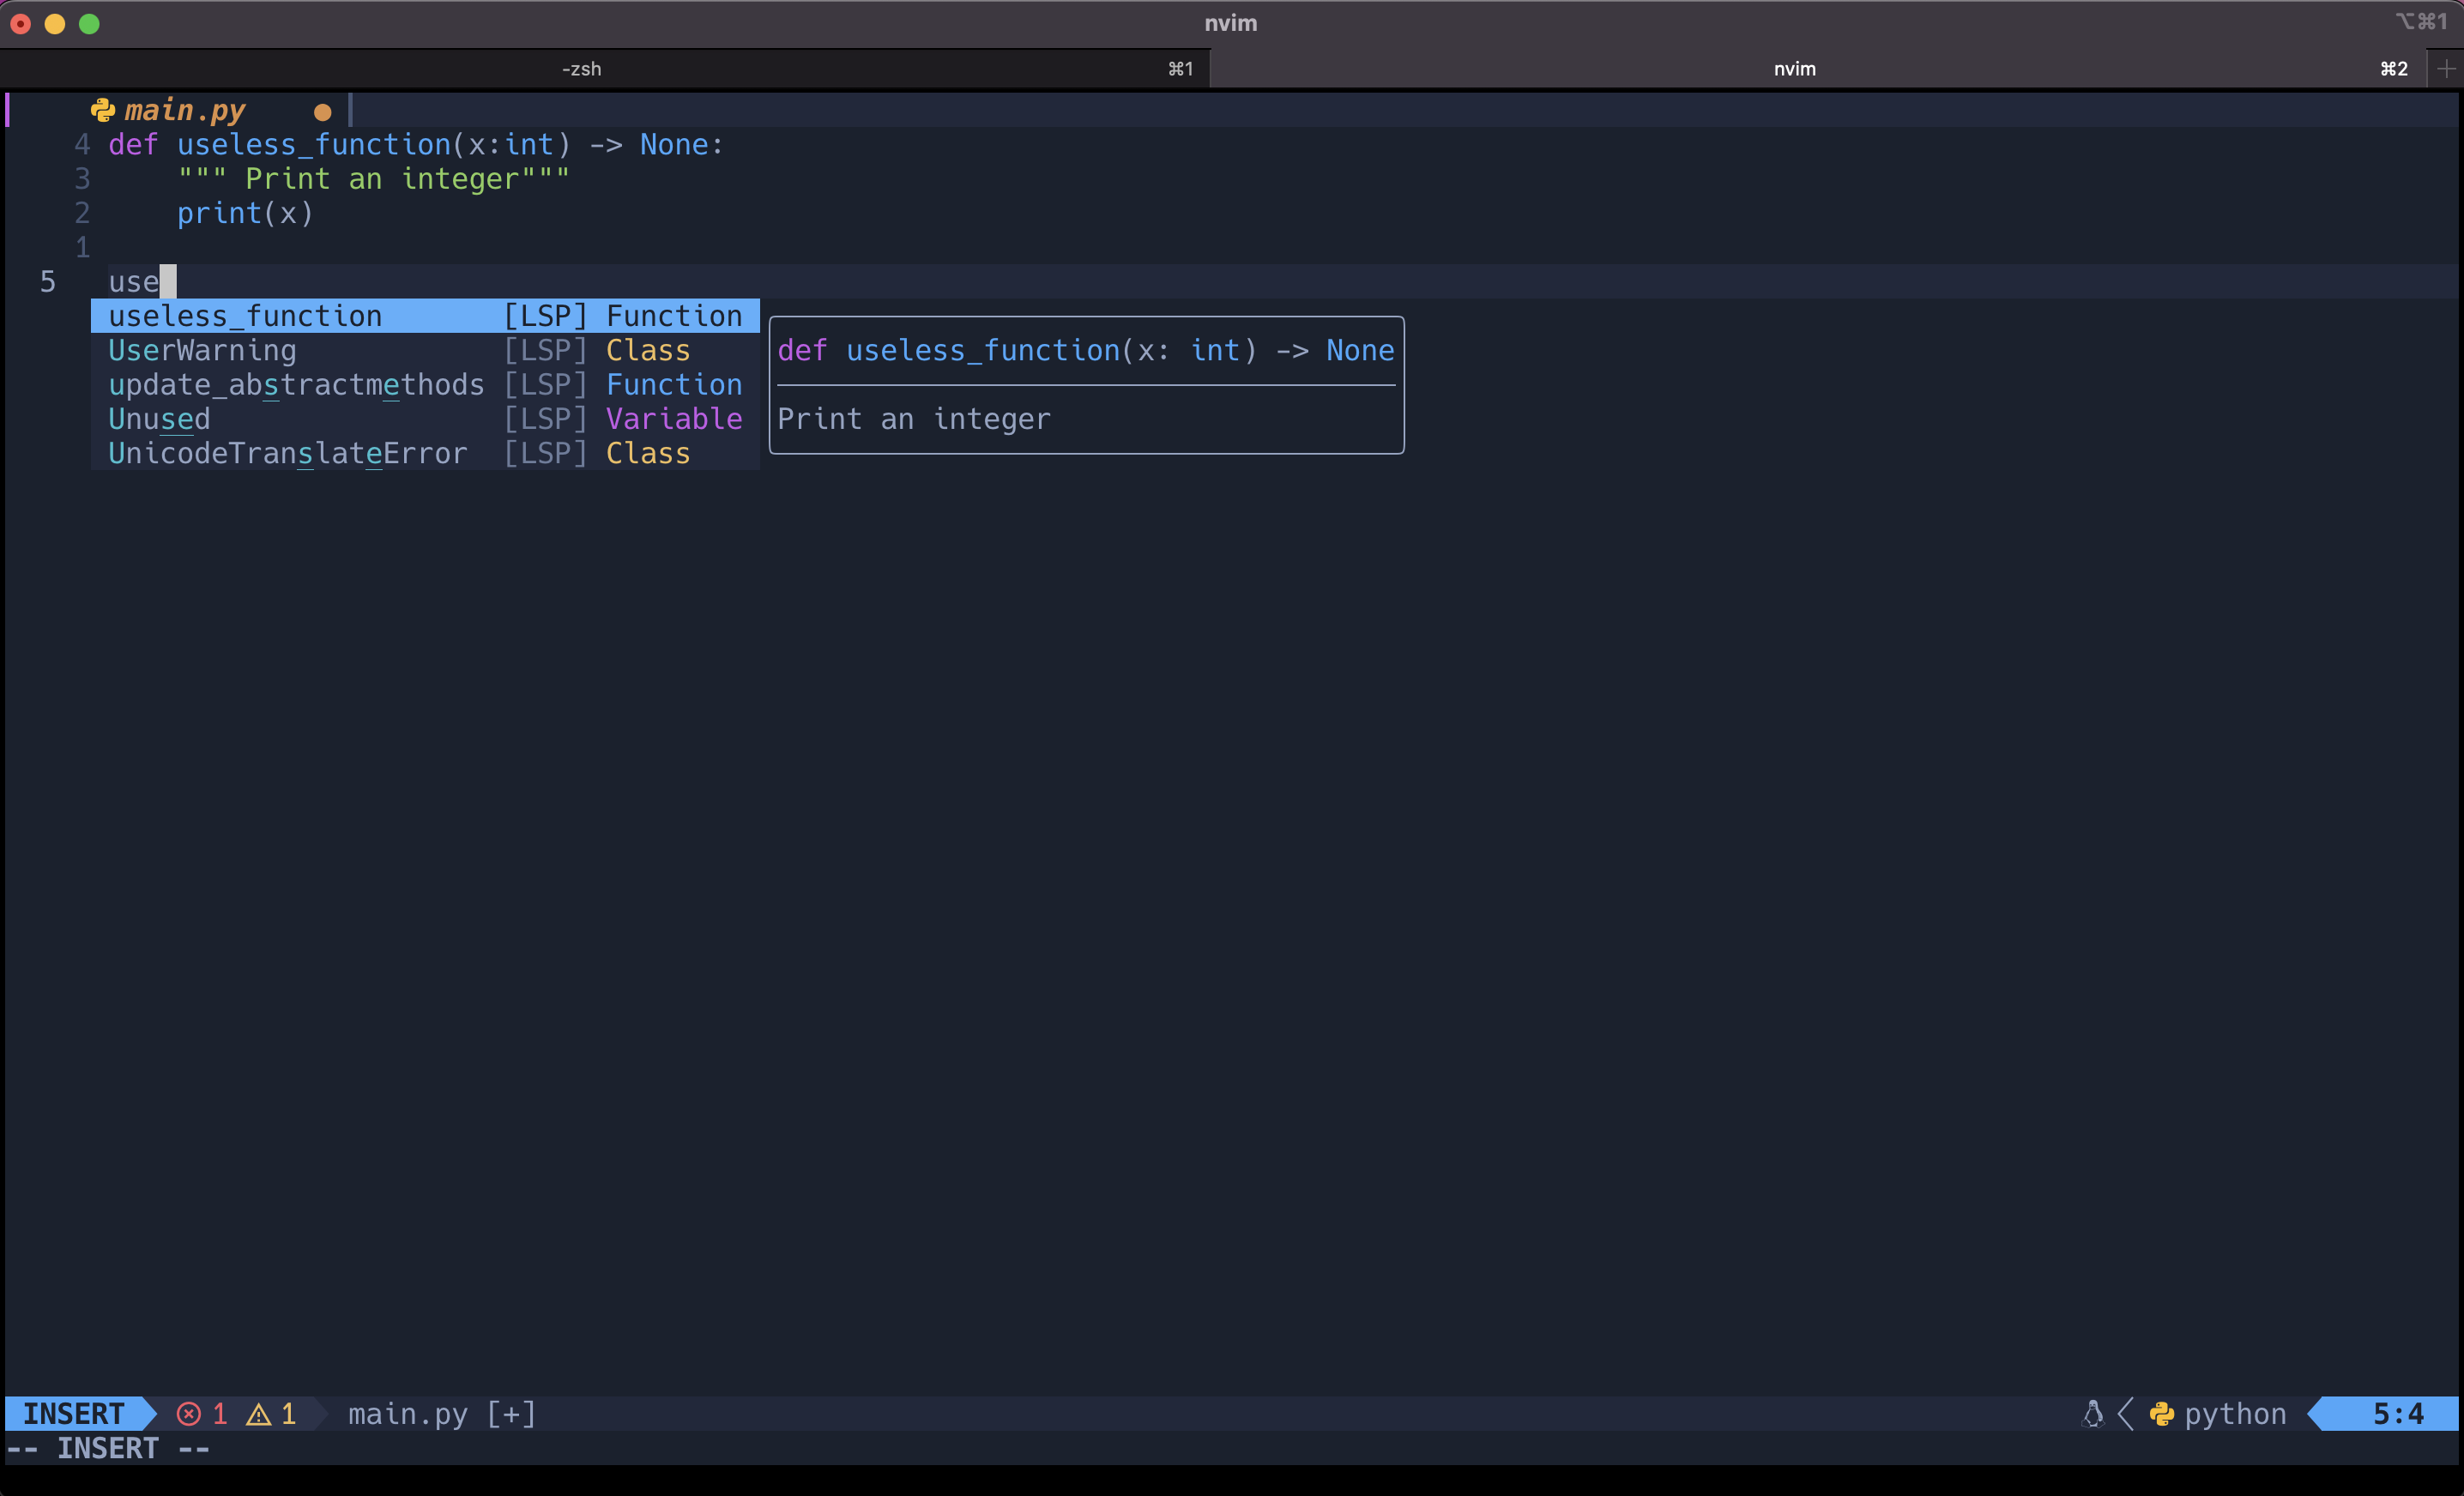
Okay now we actually have some form of an IDE ready. There is a lot going on with LSP-zero so I’d highly recommened checking out the GitHub wiki for ways to configure your LSP to suit you.
Aesthetics
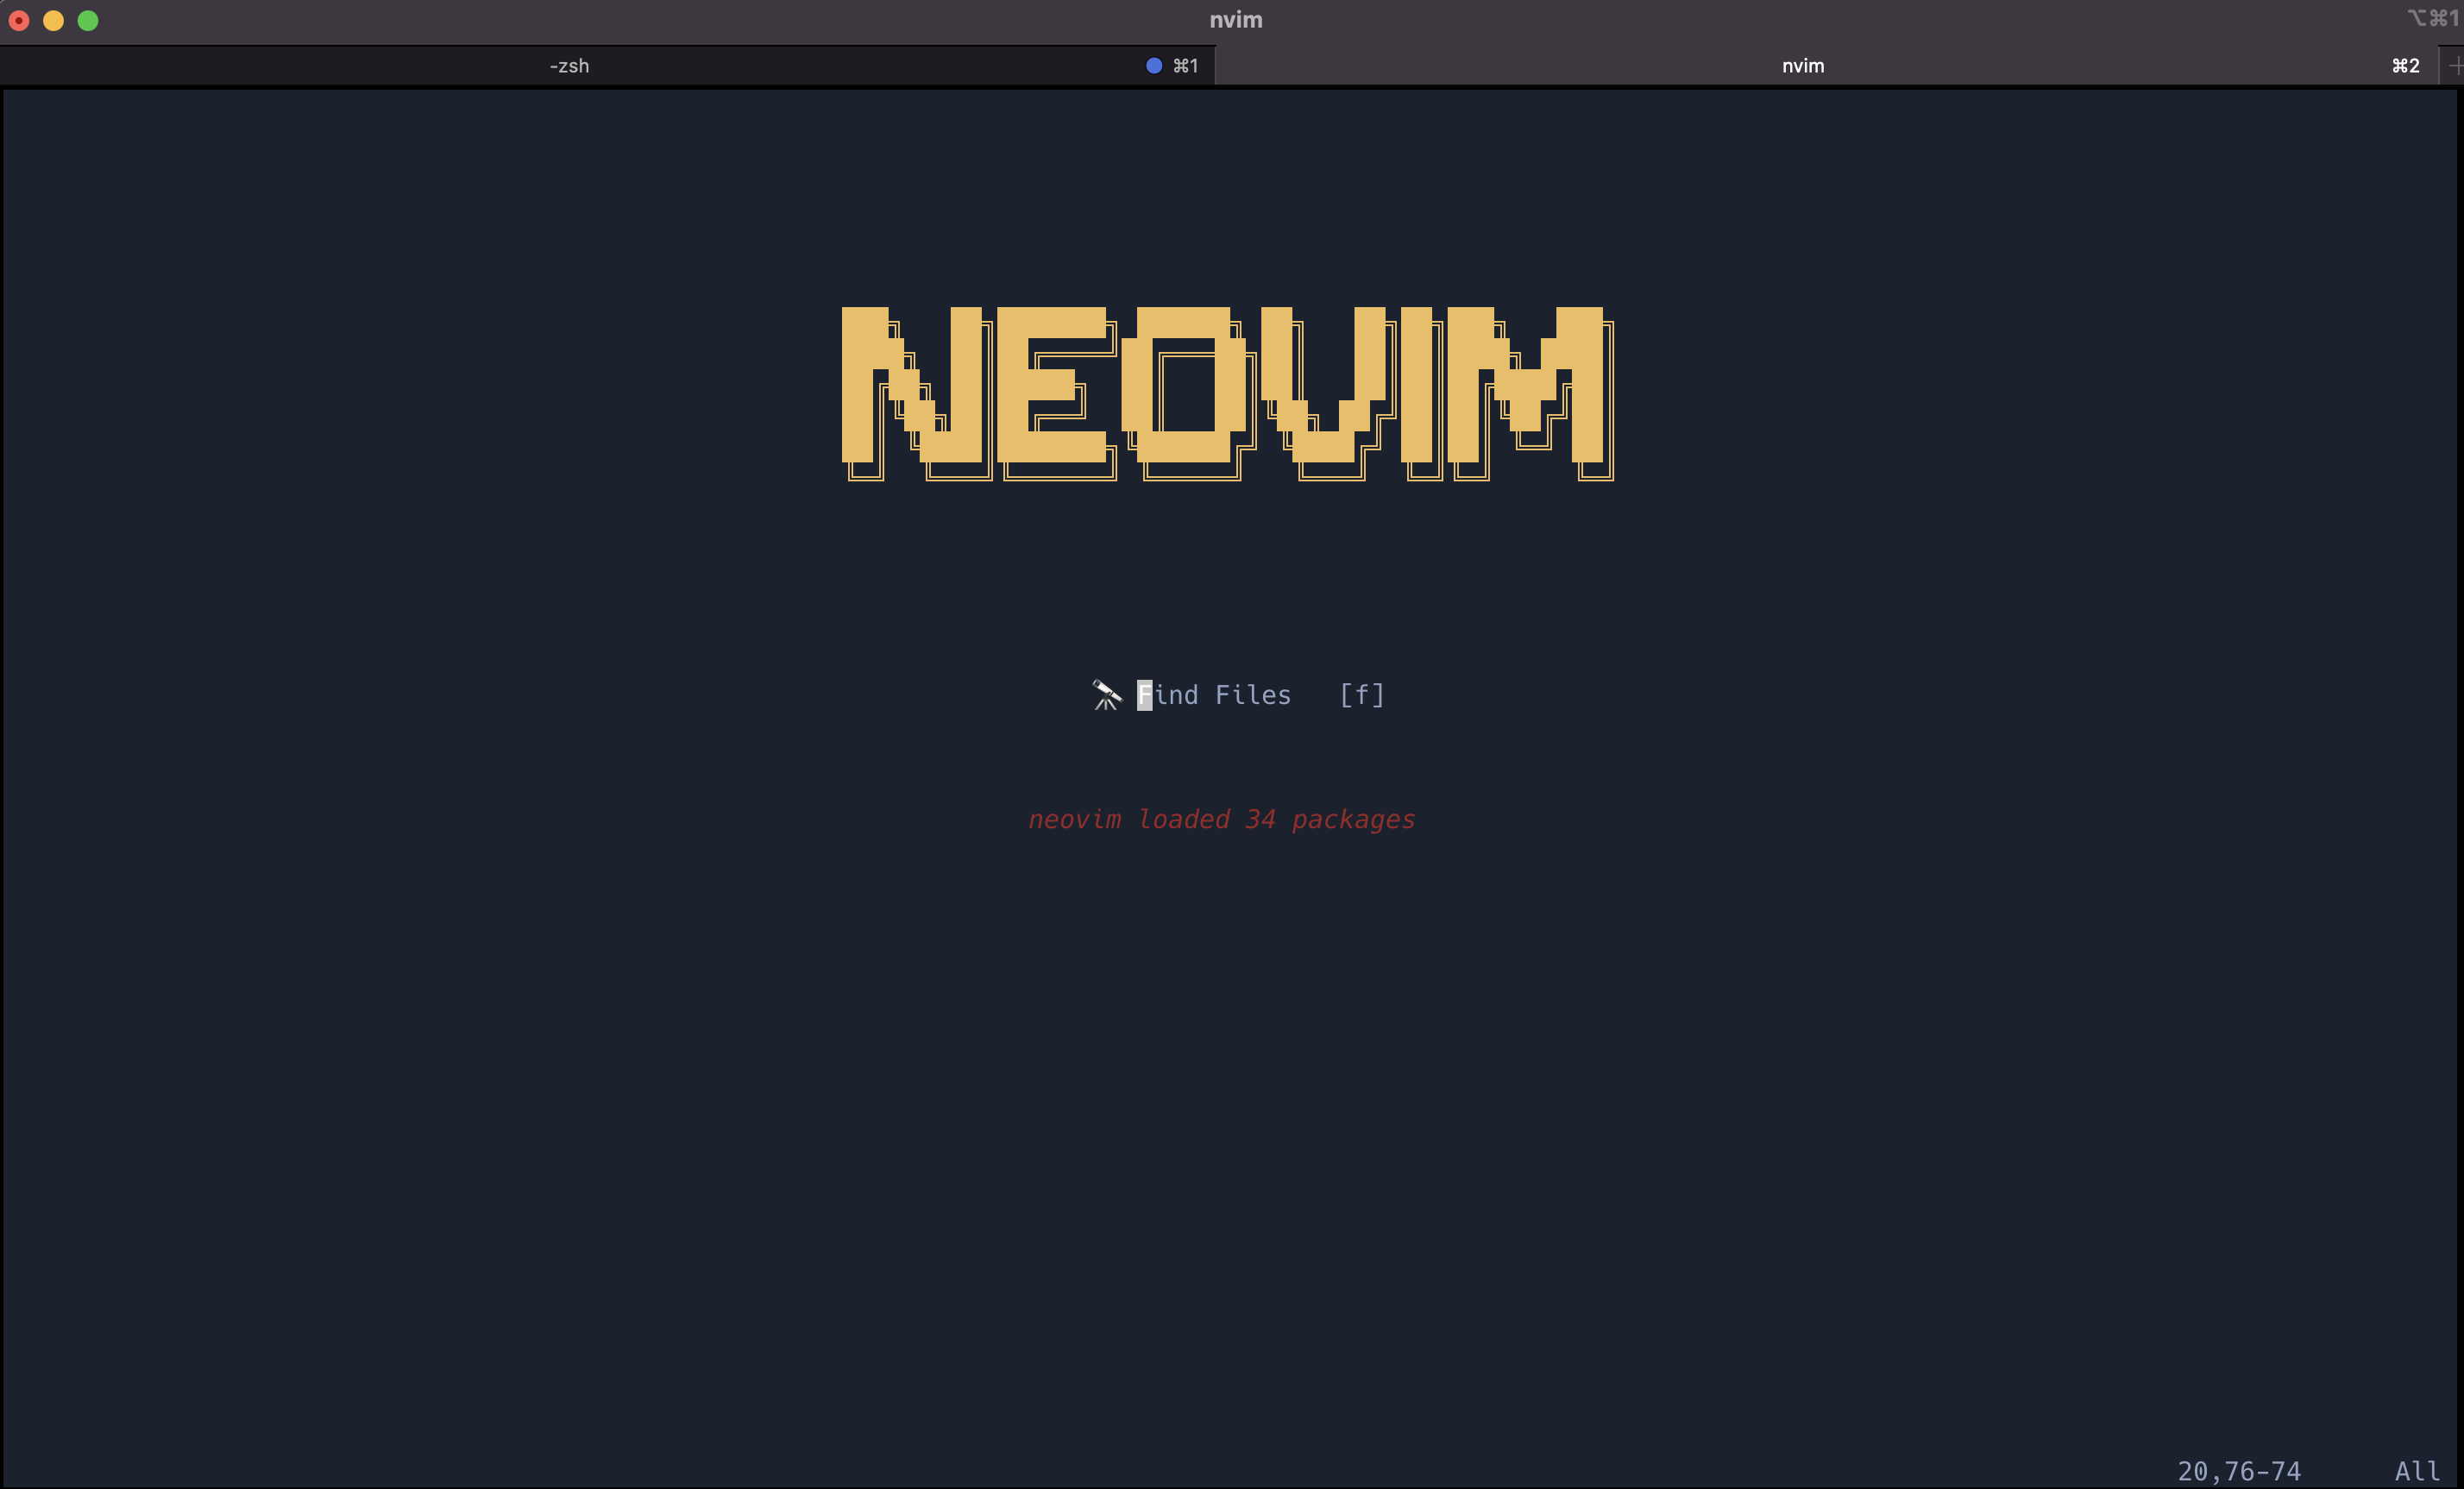
So one thing here still bothers me, we’ve got some fancy extensions, yet we’re still dealing with the default Netrc window when we launch into Neovim, we don’t want that.
Let’s have a launching dashboard, similar to the VS Code new window screen that gives options to open a file etc.
Starting with a new file in our plugins directory, the following extension is awesome:
-- lua/plugins/dashboard.lua
return {
'glepnir/dashboard-nvim',
event = 'VimEnter',
dependencies = { {'nvim-tree/nvim-web-devicons'}},
lazy = false,
priority = 1000,
config = function()
require('dashboard').setup {
theme = "doom",
config = {
header = {
"",
"",
"",
"",
"",
"",
"",
" ███╗ ██╗███████╗ ██████╗ ██╗ ██╗██╗███╗ ███╗ ",
" ████╗ ██║██╔════╝██╔═══██╗██║ ██║██║████╗ ████║ ",
" ██╔██╗ ██║█████╗ ██║ ██║██║ ██║██║██╔████╔██║ ",
" ██║╚██╗██║██╔══╝ ██║ ██║╚██╗ ██╔╝██║██║╚██╔╝██║ ",
" ██║ ╚████║███████╗╚██████╔╝ ╚████╔╝ ██║██║ ╚═╝ ██║ ",
" ╚═╝ ╚═══╝╚══════╝ ╚═════╝ ╚═══╝ ╚═╝╚═╝ ╚═╝ ",
"",
"",
"",
"",
"",
"",
},
center = {
{
icon = ' ',
icon_hl = 'Title',
desc = 'File Explore',
desc_hl = '',
key = 'e',
action = 'Telescope file_browser'
},
},
},
}
end
}With this we can specify a dashboard however we like it, with a header, center content, and footer as well. Setting up a homescreen with shortcuts for your shortcuts. I found here however with Lazy.nvim that it was necessary to NOT lazy load any plugins you wish to use from the dashboard. In the example above, to get your file browser to behave as intended, you must change the configuration to:
-- nvim/lua/plugins/telescope.lua:

return {
    { 'nvim-telescope/telescope.nvim', tag = '0.1.1', dependencies = { 'nvim-lua/plenary.nvim'} },
    {
        'nvim-telescope/telescope-file-browser.nvim',
        lazy = false, -- ADD THIS LINE HERE
        keys = {
            {"<leader>fe", ":<cmd>Telescope file_browser<cr>", desc = "Explore Files"} -- Map leader -> f -> e to run the command Telescope file_browser followed by <cr> (carriage return?)
        },
        config = function()
            require('telescope').load_extension("file_browser")
        end
    }
}
And then we’re left with a nice looking homescreen to greet us when we open Neovim, as well as this, we no longer need to type nvim . to open neovim, simply nvim and you’re greeted with:
Other Awesome Plugins
The above barely scratches the surface of the incredible plugins that exist within the Neovim landscape. Below are some others that I use, my full config can be found here, and a great link with a much larger list of plugins can be found here.
- nvim-surround - Super useful for surround text with brackets or quotations etc.
- trouble.nvim - Awesome for showing language server diagnostics within a file
- toggleterm.nvim - Terminal Integration
- vim-dadbod & vim-dadbod-ui - Database integration
- autoclose.nvim & Comment.nvim - Automatically close brackets and quotations etc. and easier block commenting of code.
Lastly, and sort of the cherry on top to really max out the Neovim experience is Neovide which is a GUI wrapper for Neovim, adding some really nice animations and making everything feel so smoooooth.
Final Thoughts
Having finally taken the time to explore Neovim and setting up my own config, I think I’d say that it’s definitely worth it. It feels incredibly responsive and I love how easy it is to find almost any functionality you could want already kindly built by someone else as a package.
Furthermore, it’s actually fun to do. As a developer you spend so much of your time inside of an editor, so you may as well spend the extra couple of days taking the time to personalise your experience to suit you.
I’d also like to note that having gone through the process using both Packer and Lazy as package managers, I do find that Lazy lowers the barrier to entry significantly.